


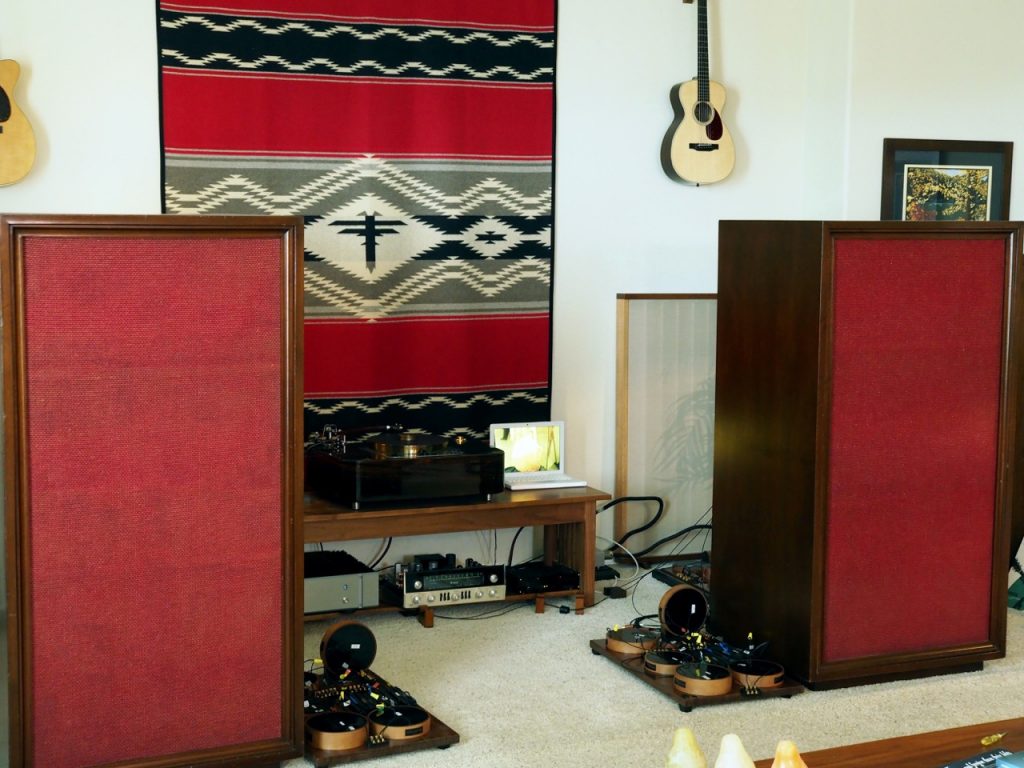
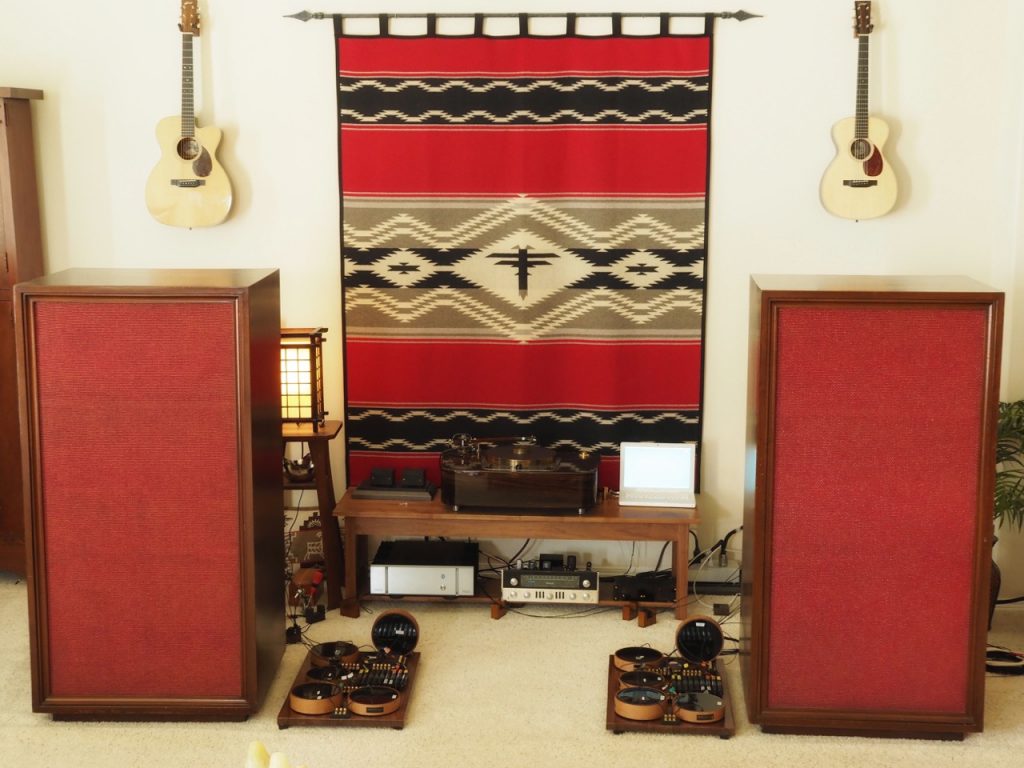
It's been a long road from the conception of the idea of building custom state-of-art Duelund CAST tinned-copper crossovers with Frederik Carøe of Duelund Coherent Audio for the historically important vintage - and state-of-art for their time period - "Stokowski" Altec loudspeakers that were custom built for conductor Leopold Stokowski back in the early 1960s (photo below).
If you haven't yet read the recent Overview & Update post (HERE) on the Duelund-Altec Project, it's worth your time to read or re-read through it for an orientation to the project.
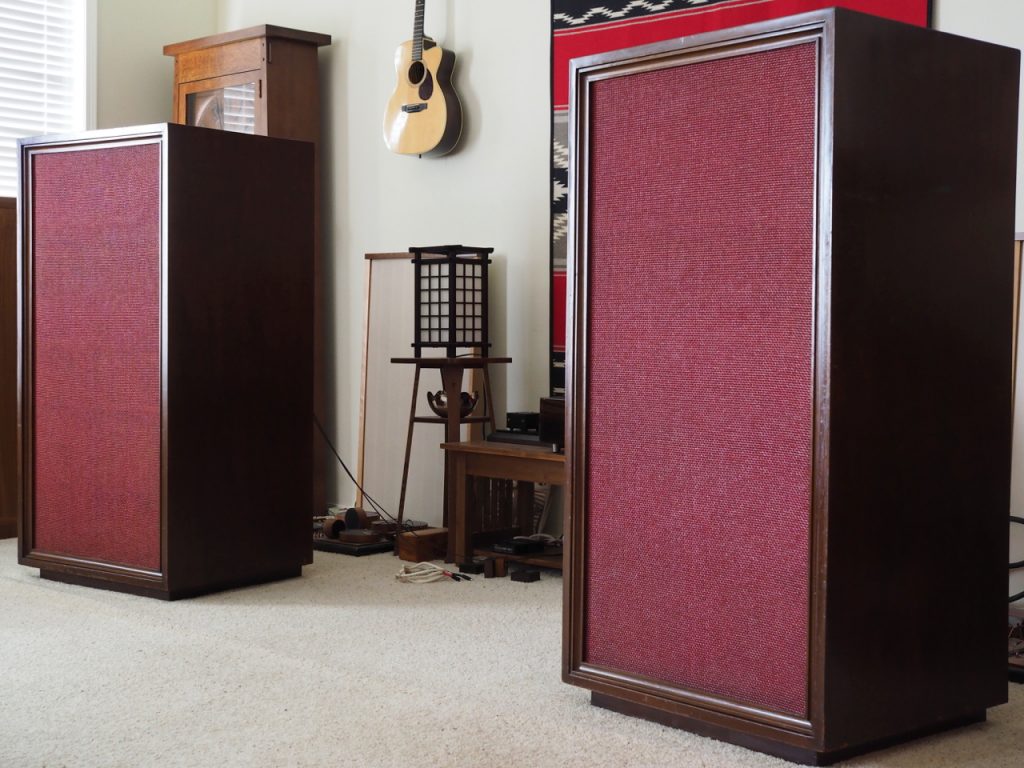
The "Stokowski" custom Altec loudspeakers.
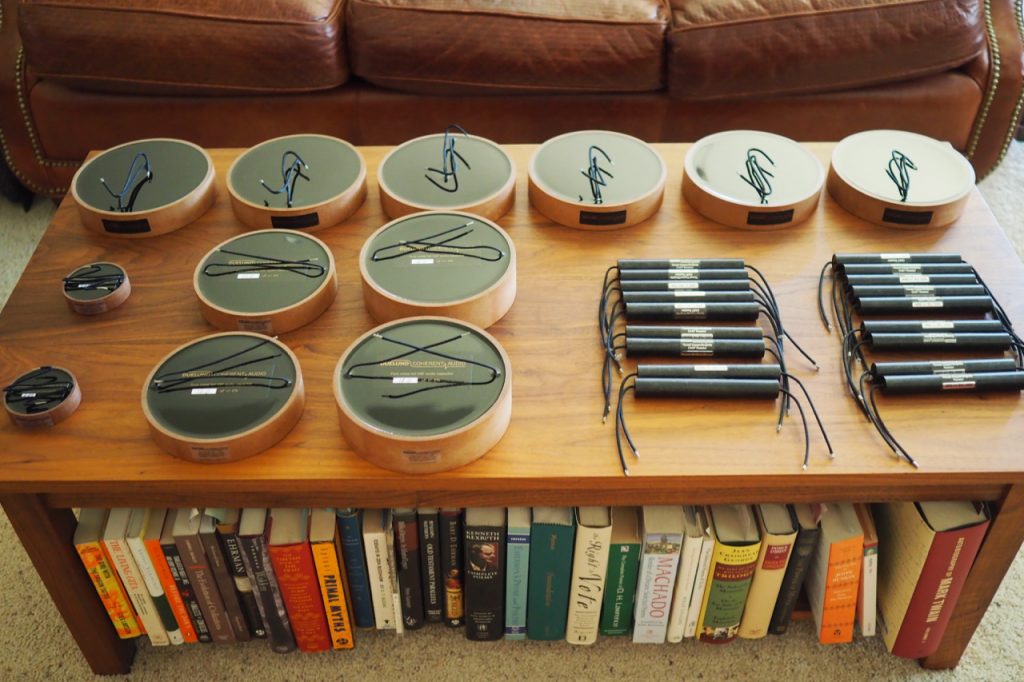
The new Duelund CAST Sn-Cu inductors, capacitors, and resistors for the Duelund-Altec Project.
After the idea for Duelund-Altec Project was conceived, it was a long road from the hand crafting of each custom Duelund CAST tinned-copper component for the project, to building the breadboard crossovers with the Duelund CAST tinned-copper components, and then testing them and determining what their final configuration should be as they accumulated some run-in time - it has been an exceptional and illuminating audio adventure!
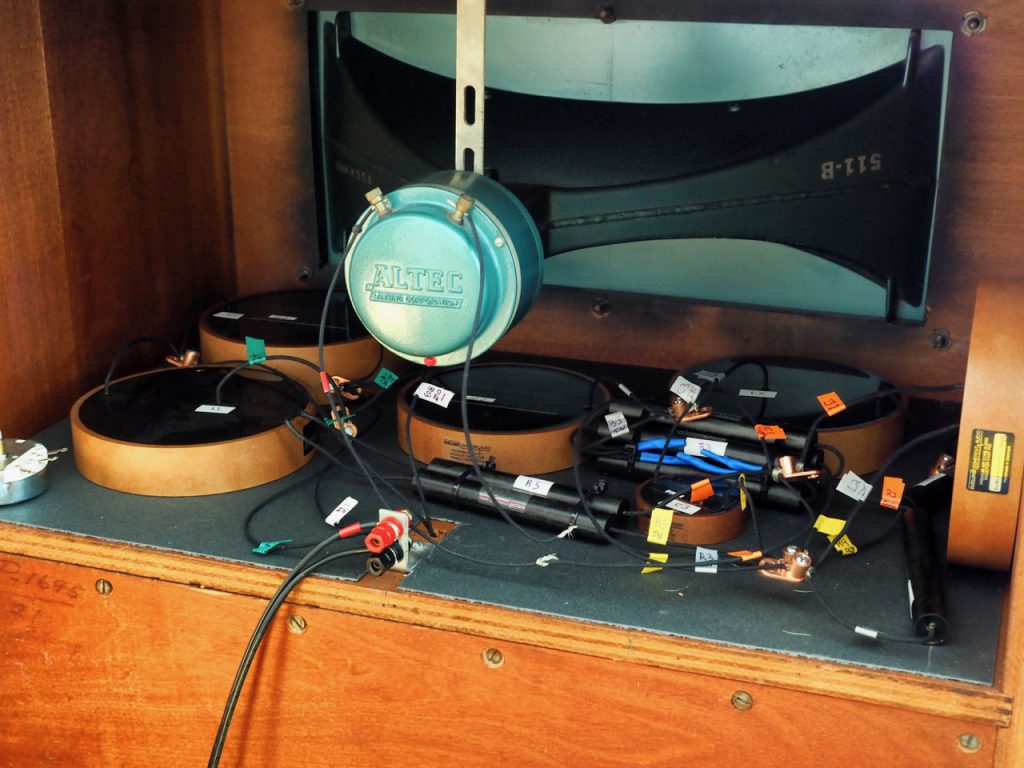
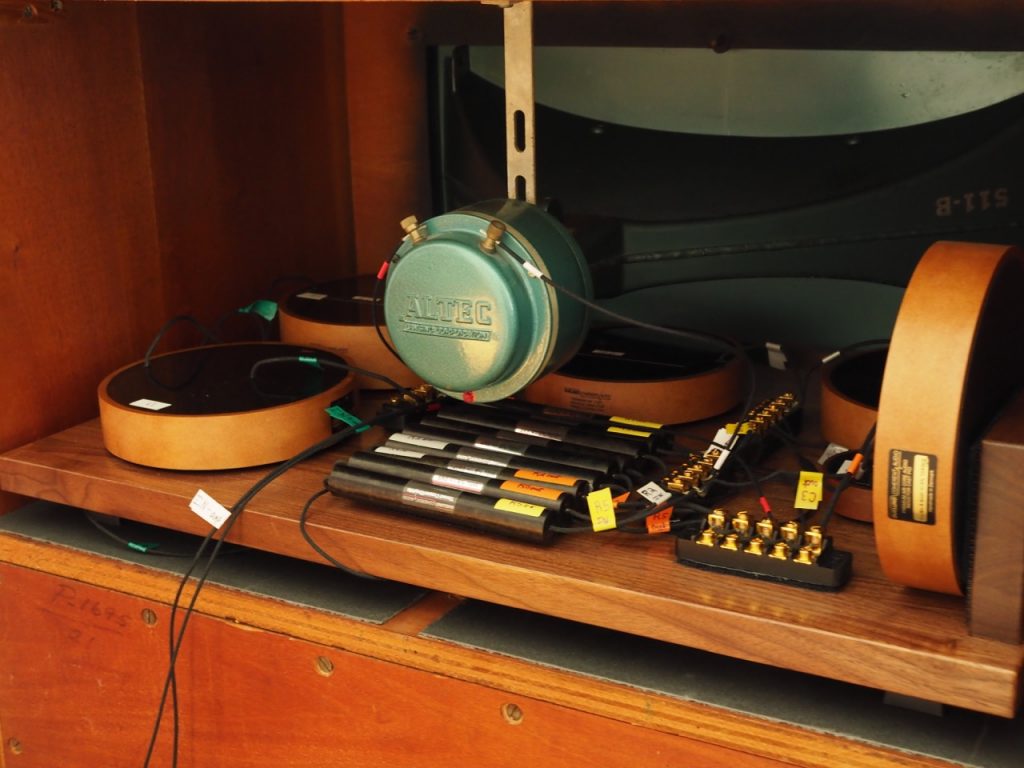
Duelund CAST Sn-Cu crossover breadboard in the Stokowski Altec high-frequency horn cabinets.
After completing the breadboard crossovers and testing them to my satisfaction, the next task was to figure out what sort of plinths to mount the final crossovers on.
For the crossover plinths, I wanted to be able to install them into the high-frequency horn portion of the "Stokowski" Altec cabinets to keep everything as compact as possible - not an easy thing to do with the massive Duelund CAST tinned-copper components, fortunately the cabinets of the "Stokowski" Altec's are equally massive and spacious!
I also wanted to be able to easily remove the crossovers and install them as outboard crossovers in case I decided I wanted to do that for ease of working on them, or modifying them, or just to display them more prominently in photo shoots.
The question that remained was what the plinths should look like, and what materials they should be made out of.
I've seen some stunningly beautiful CNC plinths with Duelund CAST components out on the Duelund & Mundorf Fanatics group on Facebook that were truly inspirational, but the more I considered that approach I decided the sophisticated CNC plinths would look out of place from a period perspective on vintage "Stokowski" Altec's, so instead I chose to go with a simple solid walnut plinth design that was close in color to the finish of the "Stokowski" Altec's cabinets, which I thought was much more befitting to their vintage character.
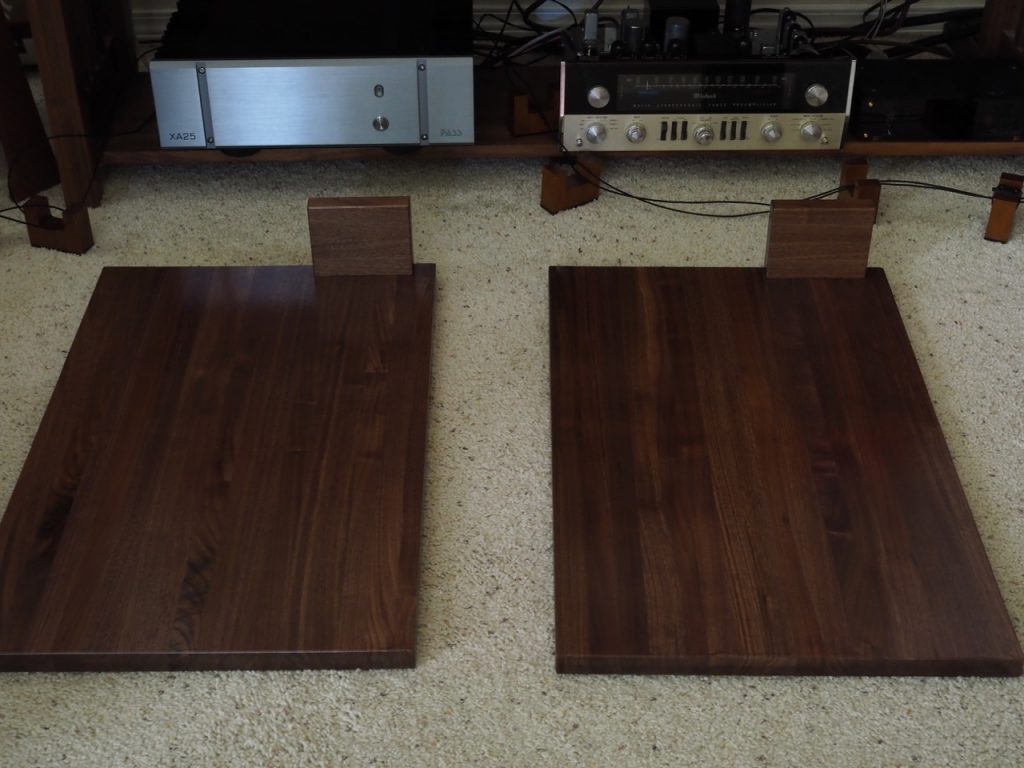
Solid walnut plinths for the Duelund-Altec Project.
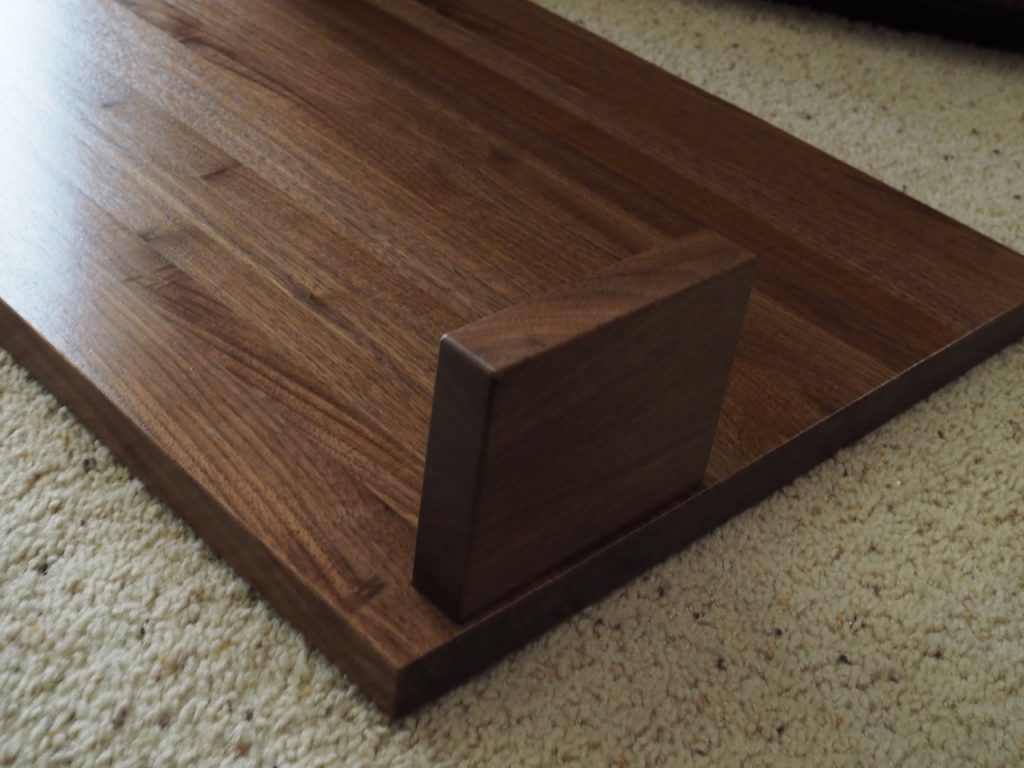
End view of the walnut block that holds the L1 Duelund CAST Sn-Cu inductor in place.
It took a few months to get the solid walnut plinths built by Amish artisan woodworkers, but now that I had the plinths on hand - and with the help of my friend David Biancosino putting the pieces together - I transitioned the Duelund CAST tinned-copper components of the breadboard crossover in the left loudspeaker to the walnut plinth, did the requisite testing to make sure I hadn't screwed up the wiring, and sat back to admire my handy-work for a bit.
Duelund CAST tinned-copper components mounted on the solid walnut plinths for the left crossover.
At this point the goal was to get the Duelund CAST tinned-copper components roughly positioned on the plinth, and once I got the same thing done for the crossover of the right loudspeaker, then I would go through and determine the components final positioning, fix them to the surface of the plinth, and finally clean up the wiring so everything looked symmetrical and "pretty".
The Duelund CAST Sn-Cu crossover for the right loudspeaker.
This afternoon I finished wiring up and testing the right crossover for the right "Stokowski" Altec, and I sat back and did a little listening to enjoy the fruits of my labors.
Now I need to do the final positioning of the components, secure the components in place, and to tidy up the wiring so everything looks nice.
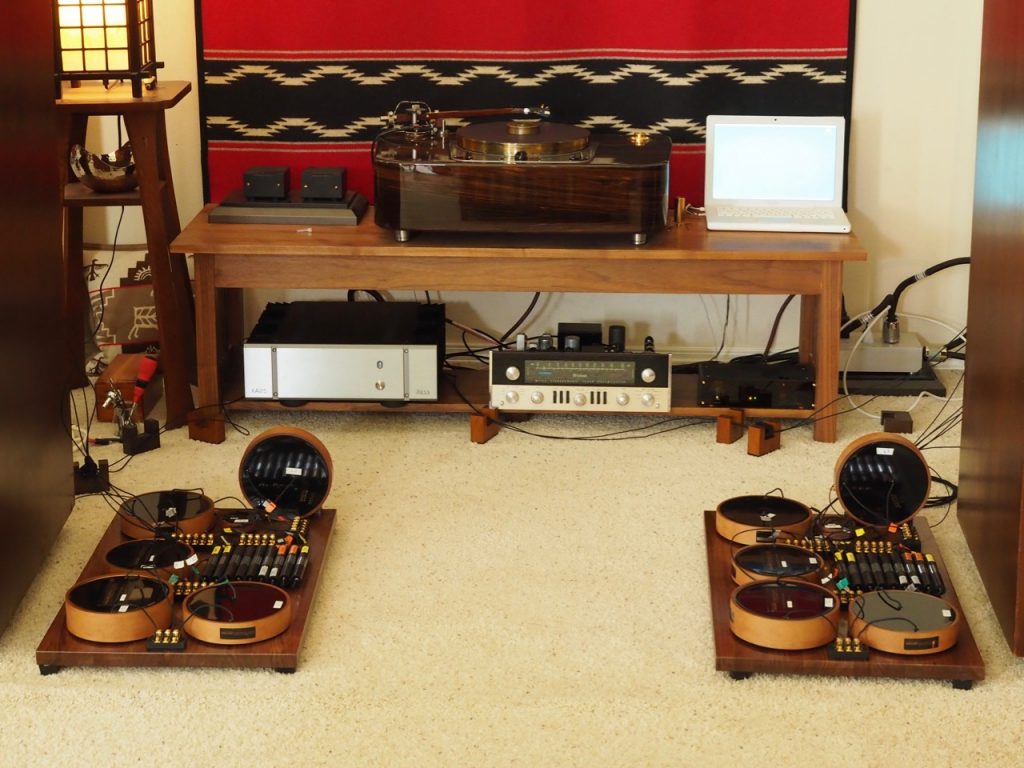
Update 2: Today I worked on the final positioning of the Duelund CAST Sn-Cu components on the plinth for the left crossover, securing them to the plinth, and cleaning up the wiring to look more neat and tidy.
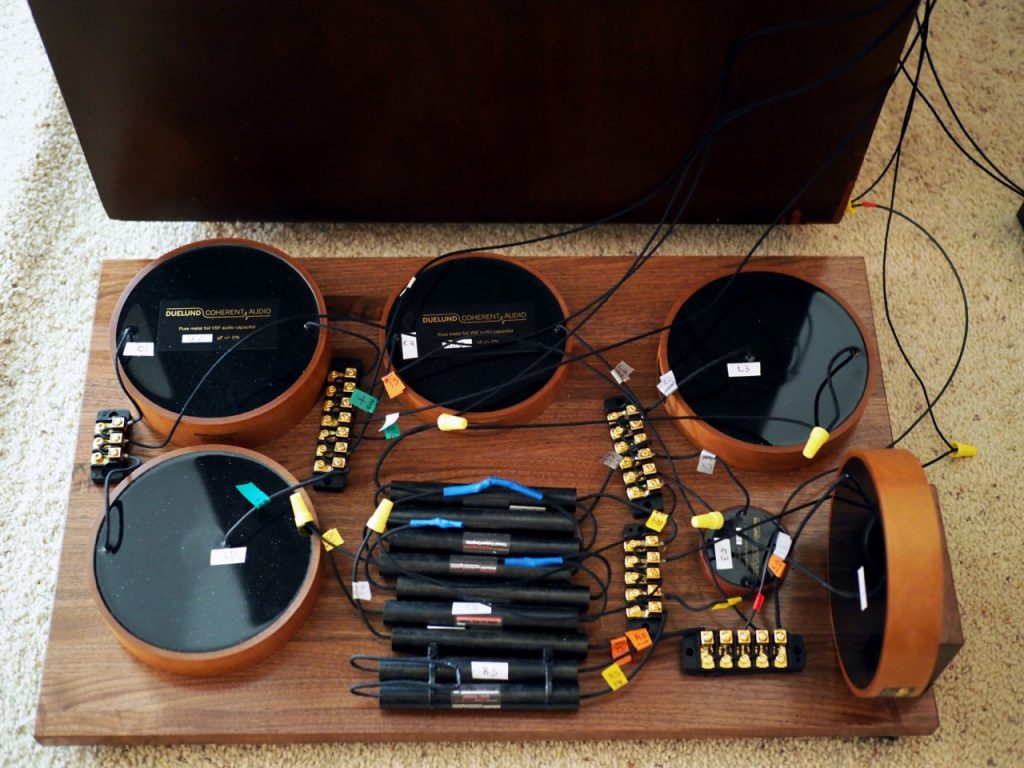
The photo below is the "before" photo of the left crossover before final positioning, securing the components, and cleaning up the wiring.
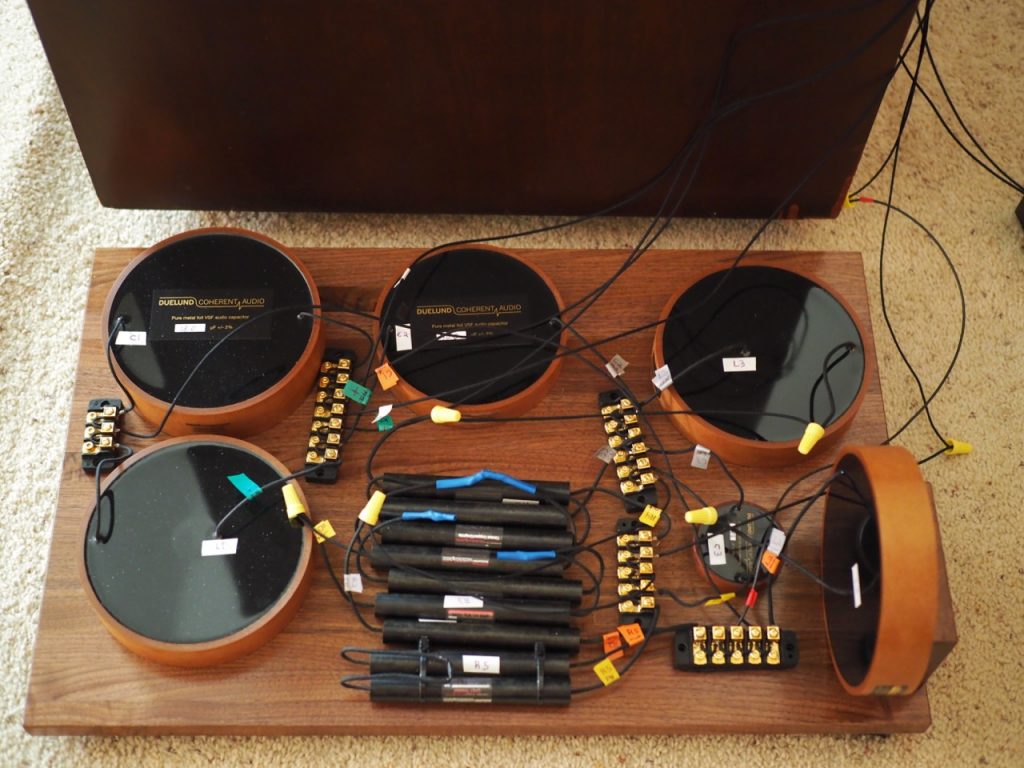
The Duelund CAST Sn-Cu crossover before photo.
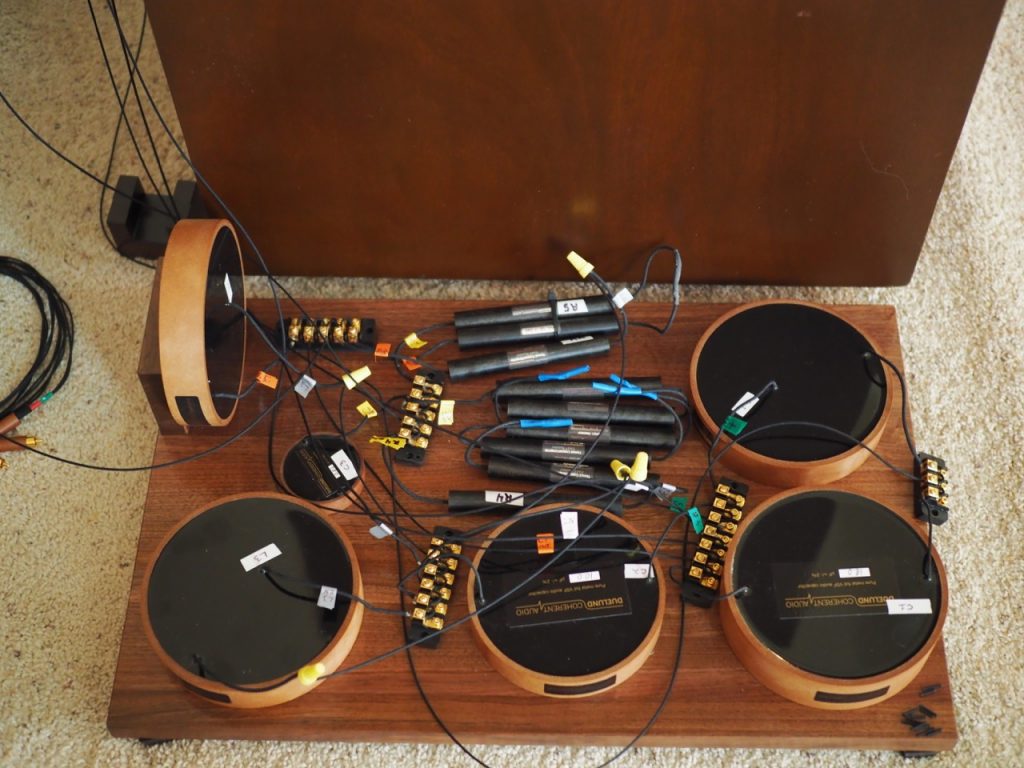
Below is the "after" photo of the Duelund CAST Sn-Cu crossover after final positioning of the components and cleaning up the wiring.
The wiring you see going up towards the upper right-hand corner of the crossover are the wires that connect to the drivers, and once the crossover is installed into the loudspeaker cabinet those wires will "disappear" out of sight inside the cabinet.
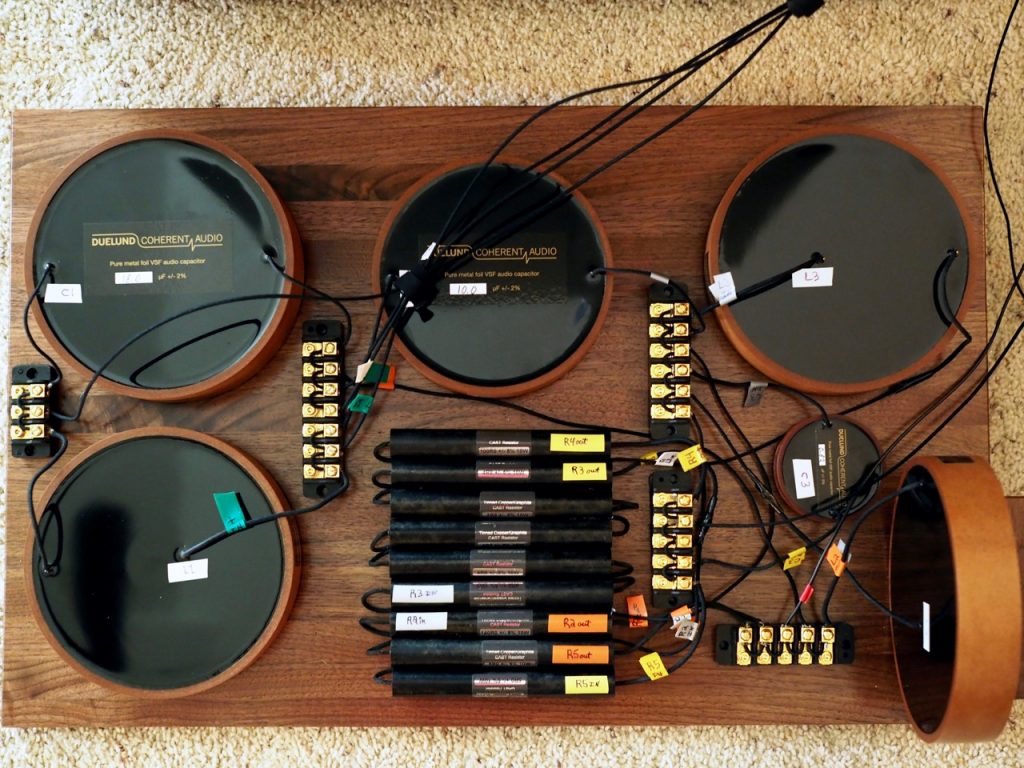
The "after" photo of the Duelund CAST Sn-Cu crossover.
Doing the final positioning of the components, fixing them to the plinth, cleaning up the wiring, and testing to make sure the left crossover was working as it supposed to, took me much longer than expected, a good nine hours to get it all done.
The gorgeous gold terminal strips you see in the photos are courtesy of Santos Oropel (Troy Audio). They clamp the wires together instead of using solder joints, which I think gives better sound quality, much like the McMaster Carr lugs I used for the Duelund-Westminster Project, but much more beautiful with their gold plating and CNC'd bases - thank you Santos!
Below is an end view of the completed Duelund CAST Sn-Cu crossover - it's a beauty! 🙂
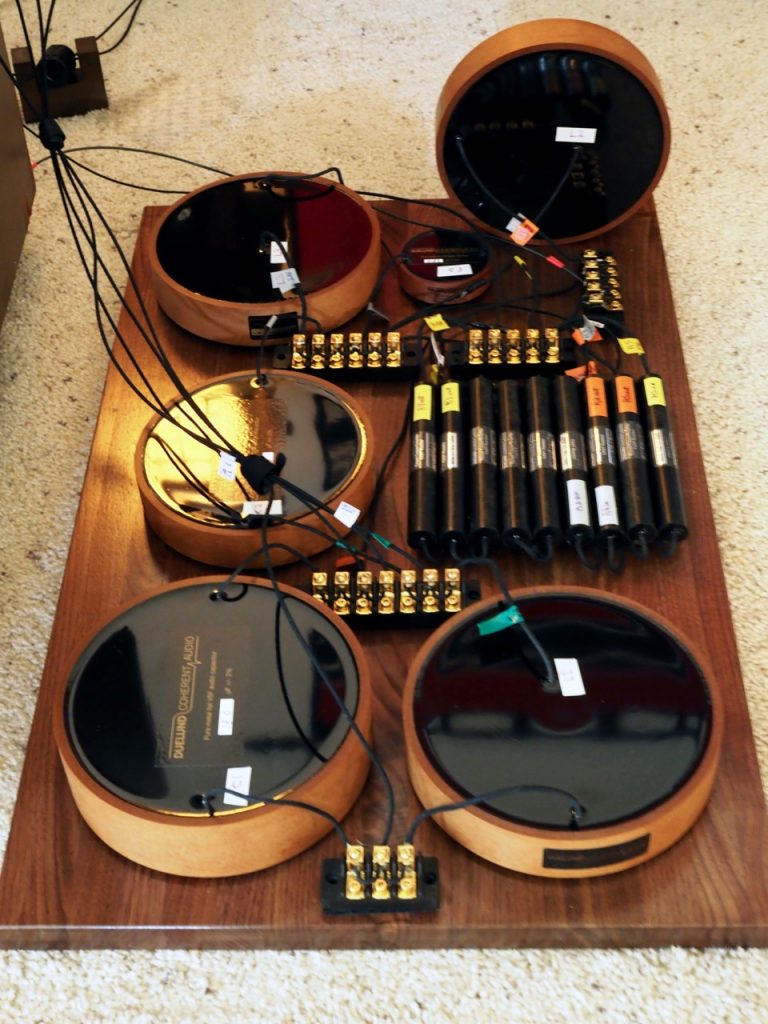
End view of the Duelund CAST Sn-Cu crossover.
Update 3: This morning I finished up the final positioning of the Duelund CAST Sn-Cu components for the right crossover (photo below), fixing them to the plinth, cleaning up the wiring, and testing it to make sure everything was working as it's supposed to.
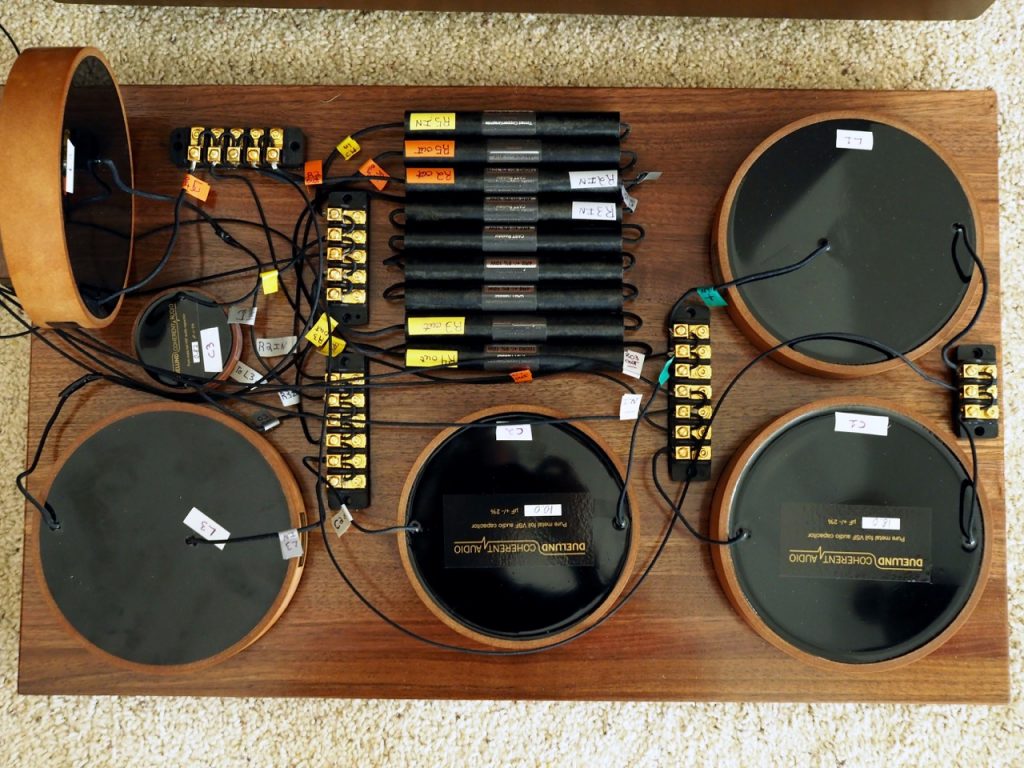
Right Duelund CAST Sn-Cu crossover for the Duelund-Altec Project.
Now I have a complete set of finished left & right Duelund CAST Sn-Cu crossovers for the Duelund-Altec Project!
The completed pair of Duelund CAST Sn-Cu crossovers for the Duelund-Altec Project.
Doing a little listening to make sure everything is working as it's supposed to.
Duelund-Altec Project
Update 4: I got up this morning, had my usual two Americanos, then practiced my guitar for about an hour, and got a bit of writing done on the Duelund-Altec Project feature article for Positive Feedback.
Then I decided it wanted to install the left Duelund CAST tinned-copper crossover into the high-frequency horn cabinet of the left channel "Stokowski" Altec.

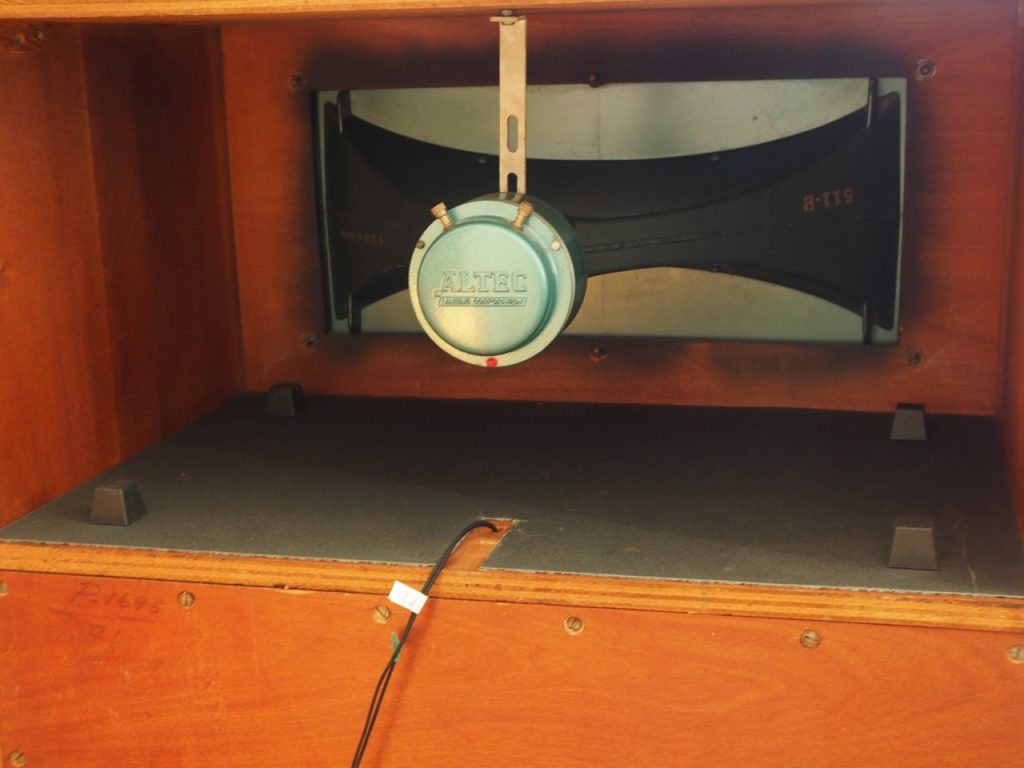
Left "Stokowski" Altec high-frequency horn cabinet all clean and ready to go.
First I cleaned the left "Stokowski" Altec horn cabinet (above) to get it ready for installing the Duelund CAST tinned-copper crossover.
After getting everything nice and clean, I removed the binding posts, which I'm not using, instead preferring to connect the speaker wires from the amps directly to the robust terminal strips provided by Santos Oropel (Troy Audio).
The black layer of material that lines the bottom of the high-frequency horn cabinets of the "Stokowski" Altec's is a product of the Soundcoat Company, which provides specialized noise & vibration control solutions for aerospace, medical, and industrial application. I used their 0.070 GPDS vibration damping sheet to provide additional isolation for the Duelund CAST tinned-copper crossovers that would be positioned atop it.
Herbie's Audio Lab Big-Tall & Extra-firm with adhesive version of the Tenderfoot isolation footers.
After removing the binding posts and wiring, I then positioned the Herbie's Audio Lab Big-Tall & Extra-firm with adhesive version of the Tenderfoot isolation footers on the Soundcoat GPDS damping sheet.
My next step was to get my old power lifting belt out of the closet and put it on, and then to lift the very heavy Duelund CAST tinned-copper crossover up into the high-frequency horn cabinet and place it upon the Herbie's footers.
The Duelund CAST tinned-copper crossover installed into the left "Stokowski" Altec cabinet!
After a listened to the crossover to make sure everything was working as intended, I sat back and enjoyed my handiworks as beautiful music flowed out of the "Stokowski" Altec's.
Next comes my final step of installing the right Duelund CAST tinned-copper crossover into the right high-frequency horn cabinet, and the Duelund-Altec Project is done!
I'm writing the introduction of feature article for Positive Feedback about the Duelund-Altec Project now, and I'm really excited to get it all written!
As always, thanks for stopping by Jeff's Place to visit with me, and may the tone be with you!


