


In February 2019 we've received more snow where I live than in any February in the last 100 years. I've only been venturing out occasionally, but the upside of all that snow is it motivates me to do things inside, like this DIY 600V Duelund DCA12GA power cable project!
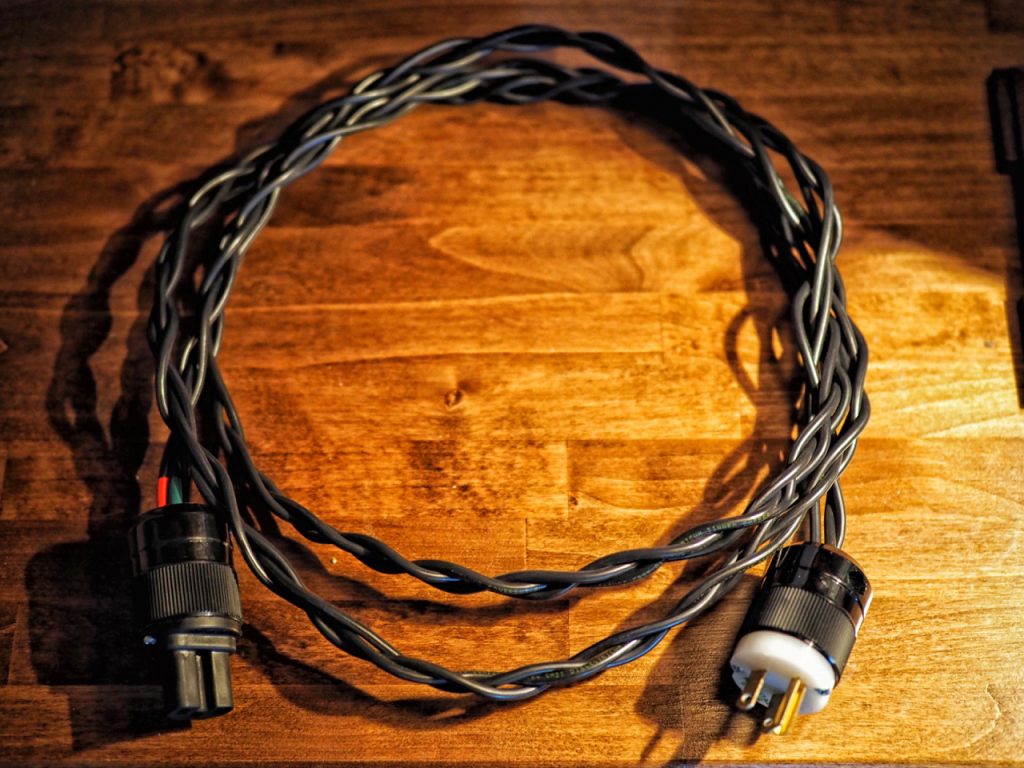
600V Duelund DCA12GA power cable
Before I get started telling you about how I built this super easy DIY power cable project, let me provide you a sober safety warning that if you do it wrong you could electrocute yourself in one of those zap-thud moments, or even worse, fry your audio gear! So please, please, be careful!
DISCLAIMER: IF YOU DECIDE TO BUILD YOUR OWN DIY POWER CABLE YOU PROCEED AT YOUR OWN RISK AND EXPRESSLY AGREE TO HOLD JEFF'S PLACE AND POSITIVE FEEDBACK HARMLESS FOR ANY PROPERTY DAMAGE, PERSONAL INJURY AND/OR DEATH, OR ANY OTHER LOSS OR DAMAGE THAT MAY RESULT FROM YOUR USE OR MISUSE OF THE INFORMATION PROVIDED.
Ok, with that out of the way, let me tell you how I built my 600V Duelund DCA12GA tinned-copper power cable.
First I cut three 2.5 meter lengths of the 600V Duelund DCA12GA tinned-copper cable to use for the live, neutral and earth cables. I color-coded both ends of the conductors with some Peavey microphone tape so I could keep track of which was the live (red), neutral (black), and earth (green).
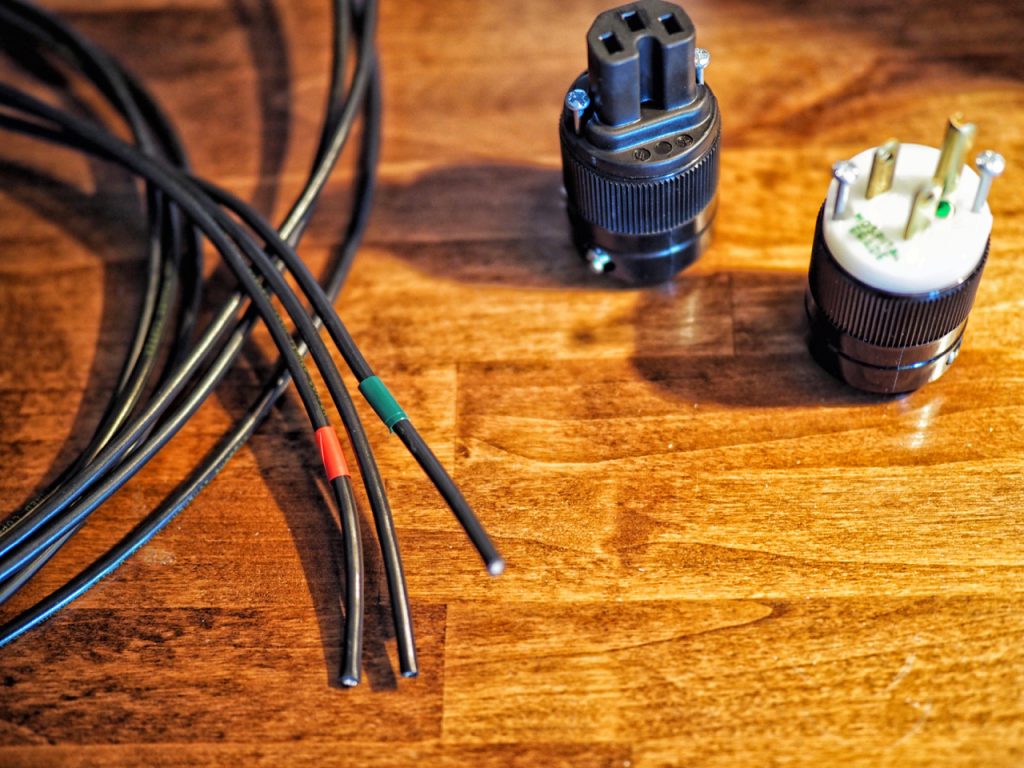
Three 2.5 meter color-coded lengths of 600V Duelund DCA12GA tinned-copper cable
Next I slipped the handle/cord clamp over the 3 conductors, then stripped off about a half inch of the insulation on each end to prepare it for termination with the plugs.
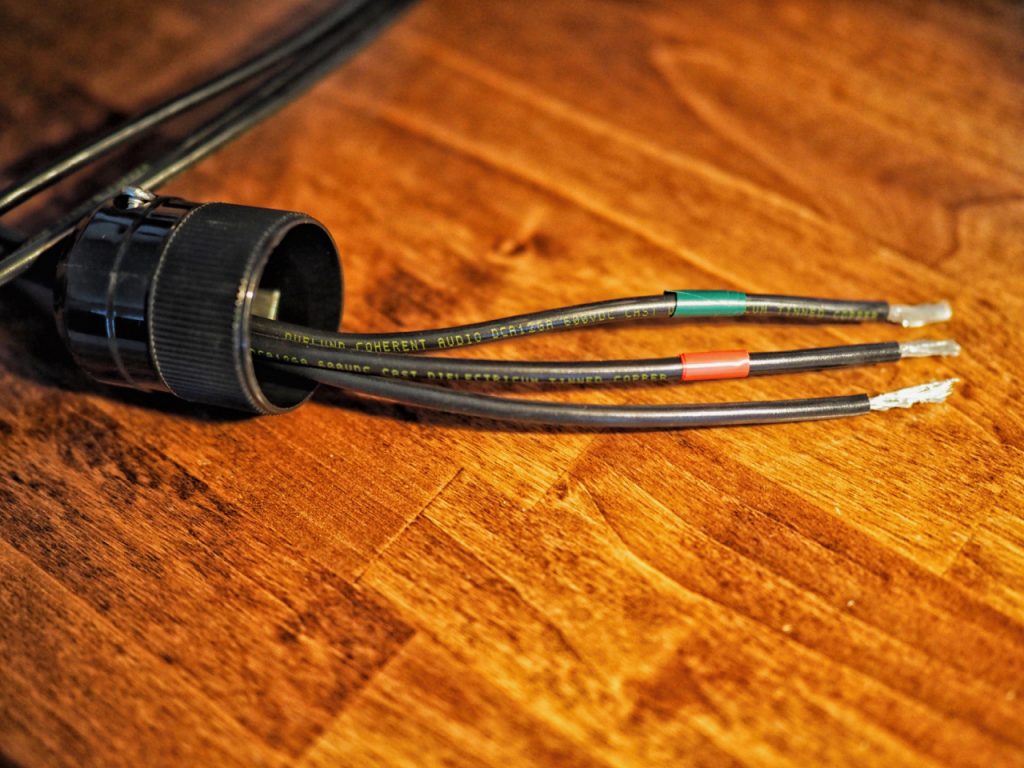
Slide the handle / cord clamp over the conductors and strip of about a half inch of insulation.
Be forewarned that the removing the insulation is a bugger, it clings to the tinned-copper conductors like its life depends on it.
The easiest way I found to strip the 600V DCA12GA was to use an X-Acto knife to first - carefully - cut around its circumference about a half inch from the end, then slice the piece lengthwise, after which you can pull off the insulator with a little effort.
I'm not sure it really matters, but I used the 600V DCA12GA wire so that the writing on it flowed from the Marinco IEC connector towards the Marinco power plug.
Marinco 8215 NEMA Hospital-Grade Power Plug 15A 125V (left) and a Marinco 320IEC15 15 Amp, 120 Volt, 2 Pole, 3 Wire, IEC 320 Connector (right).
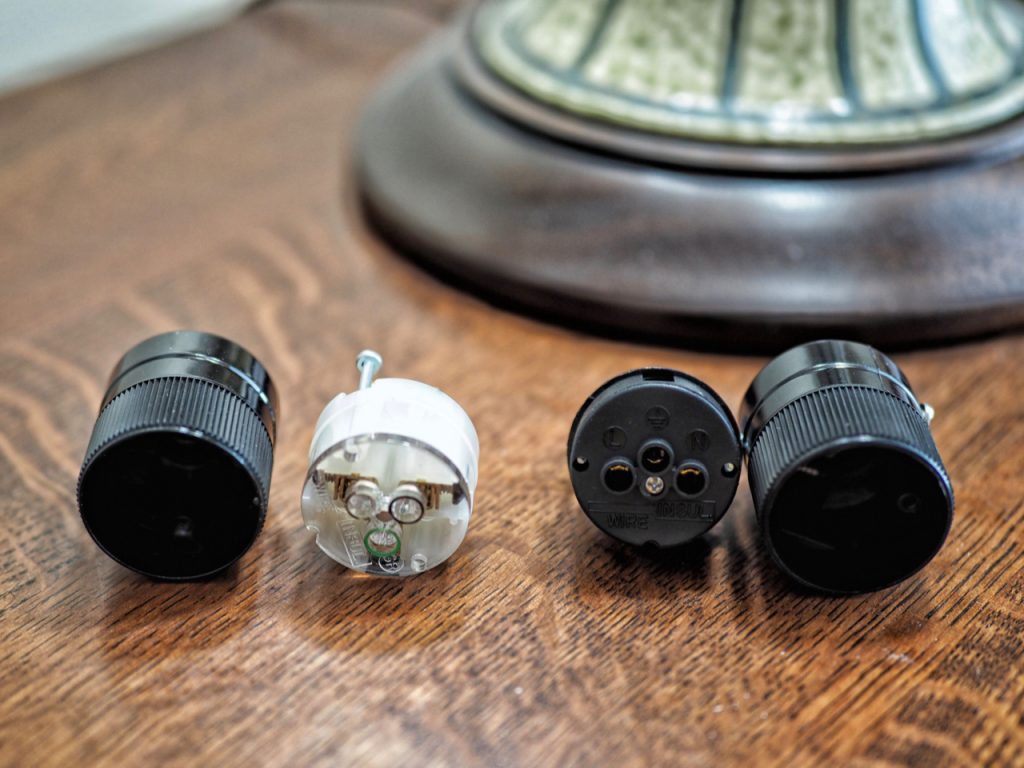
Next I affixed the Marinco IEC connector. If you look closely at the Marinco IEC connector on the right in the photo above, you'll see that "L", a ground symbol, and an "N" are embossed into the plug body.
The live (red) DCA12GA conductor goes into the "L" connection on the left, the earth (green) DCA12GA conductor goes into the center ground connection, and the neutral (black) DCA12GA conductor goes in the right "N" connection.

Marinco IEC plug with Duelund DCA12GA conductors inserted into their designated connections.
Insert each DCA12GA conductor into its appropriate connection and tighten the corresponding color-coded screws down to secure the conductors.
Then slide the handle/cord clamp down the DCA12GA into place on the IEC connector (there's a guide groove in the IEC and a corresponding guide ridge on the handle/cord clamp), and tighten down the screws to secure the IEC plug to handle/cord clamp. Finally, tighten down the screws in the handle/cord clamp to fix the DCA12GA conductors in place. That's one end of a power cord completed!
600V Duelund DCA12GA power cable
The next part is the most difficult part of the project, which is braiding the 3 DCA12GA conductors. I used a 3 strand braid pattern as described at the Animated Knots website HERE.
Marinco 8215 NEMA Hospital-Grade Power Plug 15A 125V (left) and a Marinco 320IEC15 15 Amp, 120 Volt, 2 Pole, 3 Wire, IEC 320 Connector (right).
After braiding the conductors I affixed the Marinco power plug (left in the photo above) in the same manner as I did with the IEC.
First, I again slipped the handle/cord clamp over the 3 conductors, then stripped off about a half inch of the insulation on each end to prepare it for termination with the plugs.
Next I affixed the Marinco power plug. If you look closely at the Marinco power plug on the left in the photo above, you'll see that that the left "L" connection is clear, the middle ground connection is green, and the right "N" connection is black. Your power plugs may use different color coding or nomenclature, so be sure you are using the correct plugs connections for the DCA12GA conductors.
The live (red) DCA12GA conductor goes into the clear "L" connection on the left, the earth (green) DCA12GA conductor goes into the center green ground connection, and the neutral (black) DCA12GA conductor goes in the right "N" black connection.
As with the IEC plug, insert each DCA12GA conductor into its appropriate connection and tighten the corresponding color-coded screws down to secure the conductors.
Then slide the handle/cord clamp down the DCA12GA into place on the Marinco plug (there's a guide groove in the plug and a corresponding guide ridge on the handle/cord clamp), and tighten down the screws to secure the IEC plug to handle/cord clamp. Finally, tighten down the screws in the handle/cord clamp to fix the DCA12GA conductors in place.
My new Duelund 600V DCA12GA power cable is completed!
I put my new DIY 600V Duelund DCA12GA power cable into the system on my SPEC RSA-M3 EX Real Sound Amplifier in place of the ridiculously good reference Acoustic Revive Absolute Power Cable ($12,000 USD) that I've been using on the SPEC.
My first impressions were extremely positive as I listened to Jazz24, and the good news is that the DIY 600V Duelund DCA12GA was not embarrassed in comparison to the spendy Acoustic Revive Absolute Power Cable.
To be clear, I'm not saying the DCA12GA power cable sounds as good as the $12K USD Absolute Power Cable, as I haven't done any comparative listening yet, but I can tell you that what I'm hearing from the 600V Duelund DCA12GA power cable is extremely good, and my take on its performance is similar in nature to what I've heard from the Duelund-Altec Project's Duelund CAST tinned-copper crossovers.
The DCA12GA power cable has that same tinned-copper magic of relaxed transparency, vivid imaging presence, superlative dynamics, and overall superb musicality. I'm really loving what I'm hearing from the 600V Duelund DCA12GA power cable, and I suspect you will too.
I'll continue to provide you listening impressions as I get more familiar with what the 600V Duelund DCA12GA power cable can do musically and sonically, but even at this early point in listening, I can tell you it's an easy recommendation.
Update
After I wrote this post, it occurred to me that some of you would rather have someone build a 600V Duelund DCA12GA power cable for you, rather than doing it yourself.
So I contacted Chris at Parts ConneXion, and asked Chris if Parts ConneXion would build power cords for people not wanting to build their own.
In short, Chris said they would be glad to help out: "Price is the cost of the wire (3 x whatever length you want the cable to be) + a $60 assembly fee + the connectors chosen. For example, a 2 meter 600V Duelund DCA12GA cord would be ... $60 in wire + $38 for the 2 Marinco Plugs + $60 in labour ... = $158 total ... + $14.95 overnight shipping."
So for those of you who would like to give a 600V Duelund DCA12GA power cable a try, but don't want to build it yourself, it'll cost you the price of materials plus a $60 USD assembly fee, and of course shipping to get it to your door.
As always, thanks for stopping by, and may the tone be with you!


