


As I mentioned in Part 1 of this post, I got back from Idaho yesterday afternoon where I had joined with my family to celebrate my Dad's 90th birthday! It was awesome!
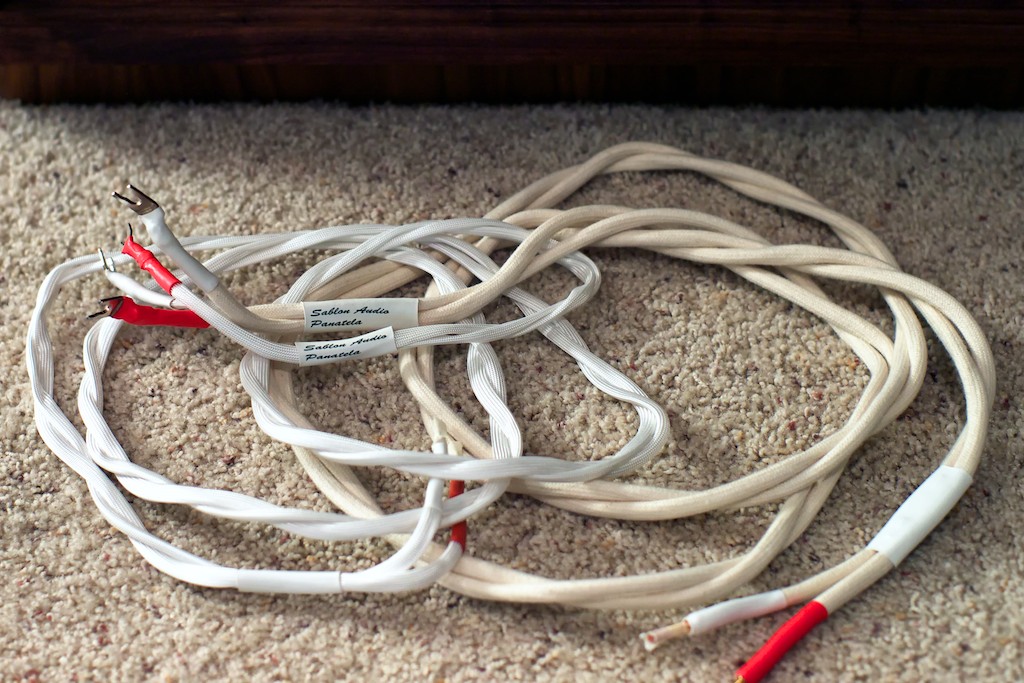
After getting home I unboxed the Panatela WRSE internal wiring set that Mark Coles had sent for the Duelund-WRSE Project. This project has been so cool with everyone rallying around to make it happen - a huge thank you to everyone!
I installed the Panatela WRSE internal wiring set into the left Westminster Royal SE last night, and I am going to update this post today as I install the set for the right side WRSE and get the system back up and running, so stay tuned as the day proceeds for progress reports.
As I mentioned in the first post, the idea for the wiring harness was to intall a continuous set of wires from the Westminster Royal SEs' Dual Concentric driver all the way to the Duelund external crossover without any connectors along the way that would degrade the fidelity of the signal.

I attached the low-frequency Panatela cable set to the Dual Concentric driver's low-frequency leads using WBT 8 AWG crimp sleeves. The high-frequency Panatela cable set was attached to the Dual Concentric drivers high-frequency contacts with a dab of WBT silver solder, as was the Panatela ground cable.
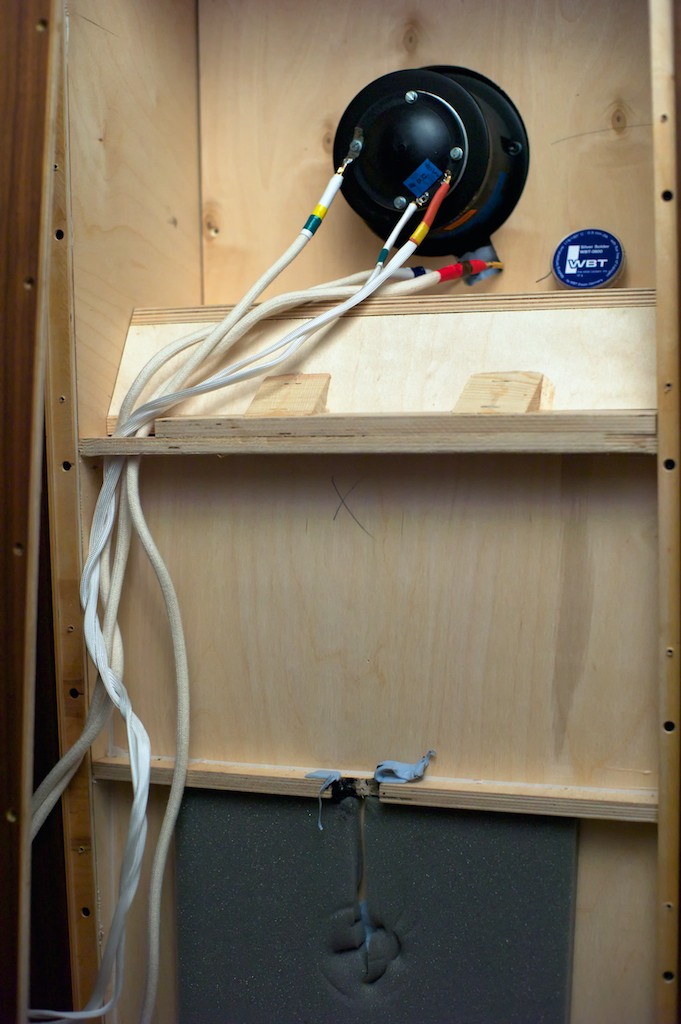
The Panatela cable set goes directly from the driver down through the routing channels in the WRSE cabinet. The second routing cutout is just above the foam in the photo. The cables were pulled over into the channel and then Blu-Tack'd in place.
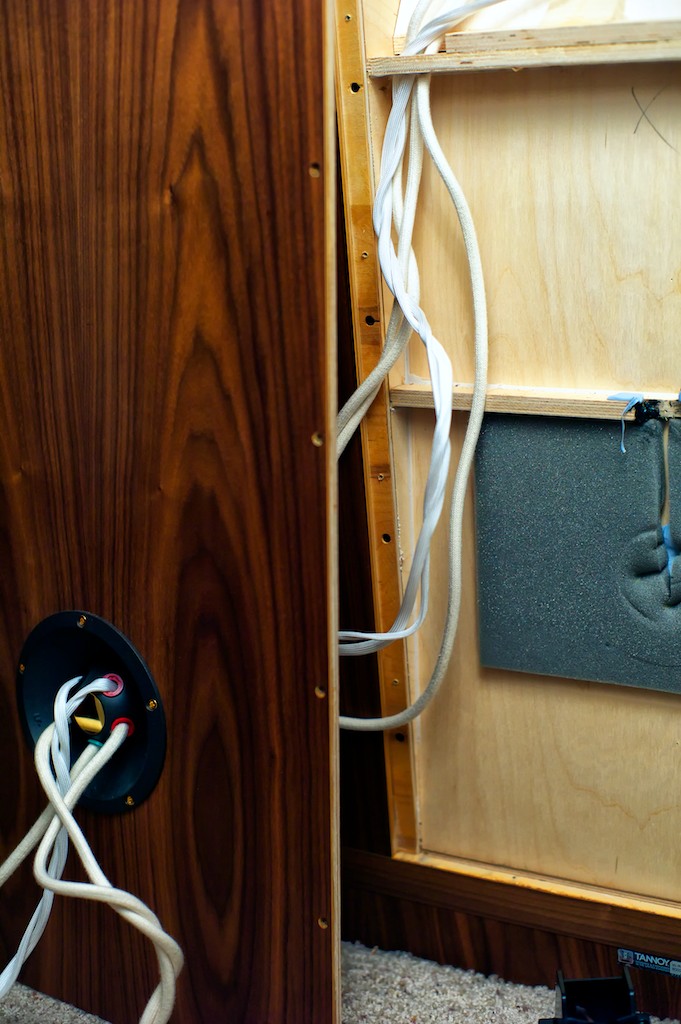
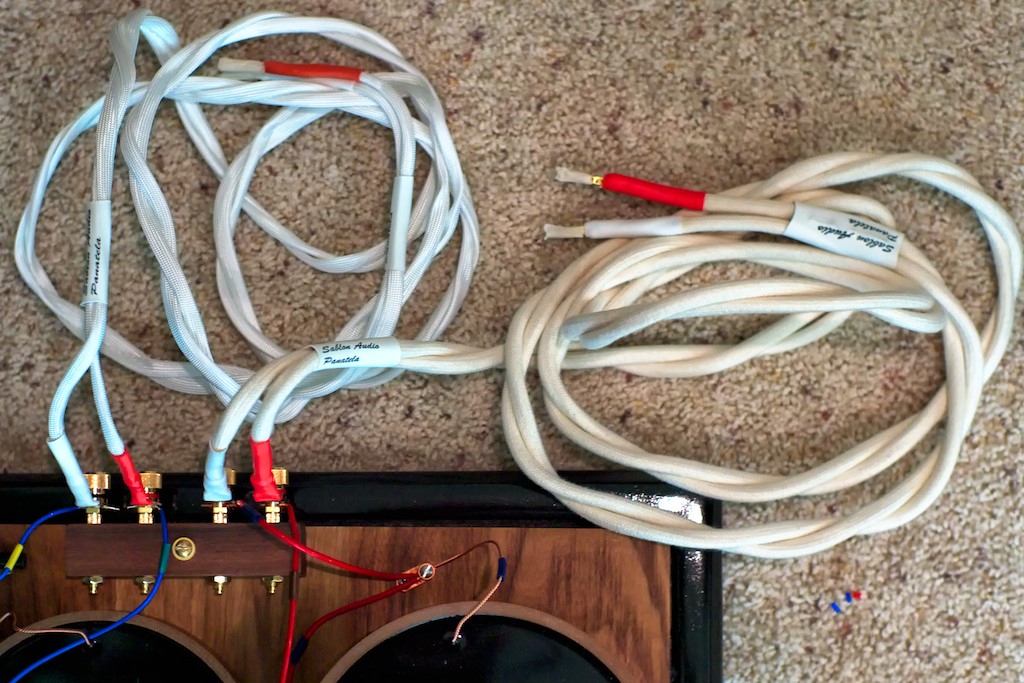
The Panatela cable set goes through the holes in the binding post plate that the stock binding posts occupied prior to their removal to give a nice and clean interface. The low-frequency Panatela cable set is a tight fit and takes a bit of wiggling to get the shrink-wrapped end stared through the holes! Once started it goes through cleanly and fits perfect.
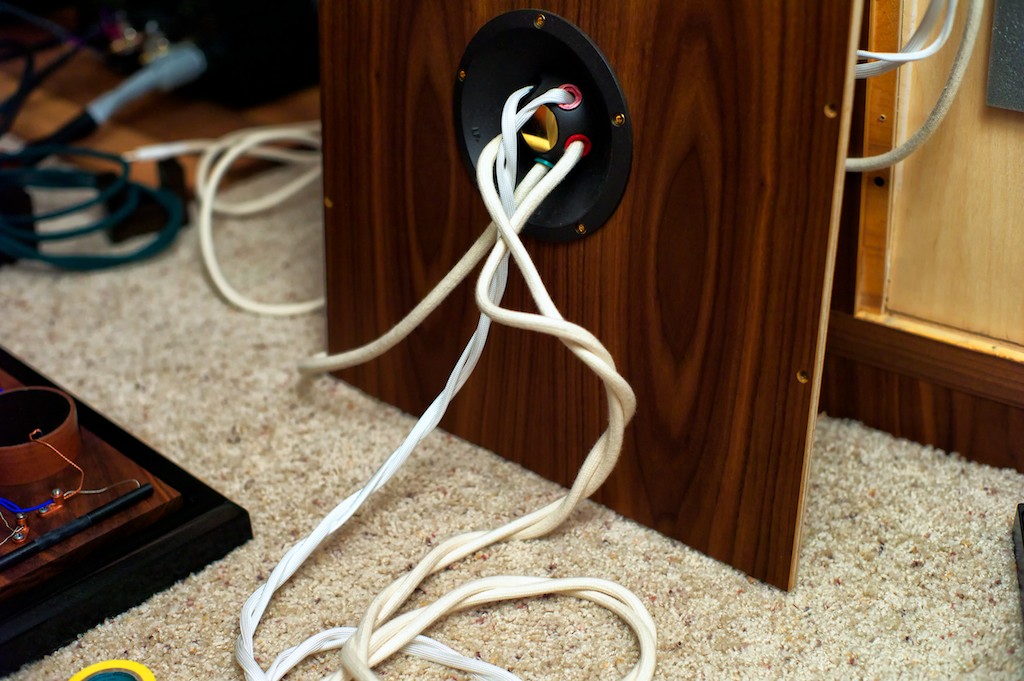
From the binding post plate the Panatela high & low-frequency cable set goes directly to the Duelund external crossover.
The dedicated ground for the driver goes off direct to the amplifier bypassing the Duelund crossover.
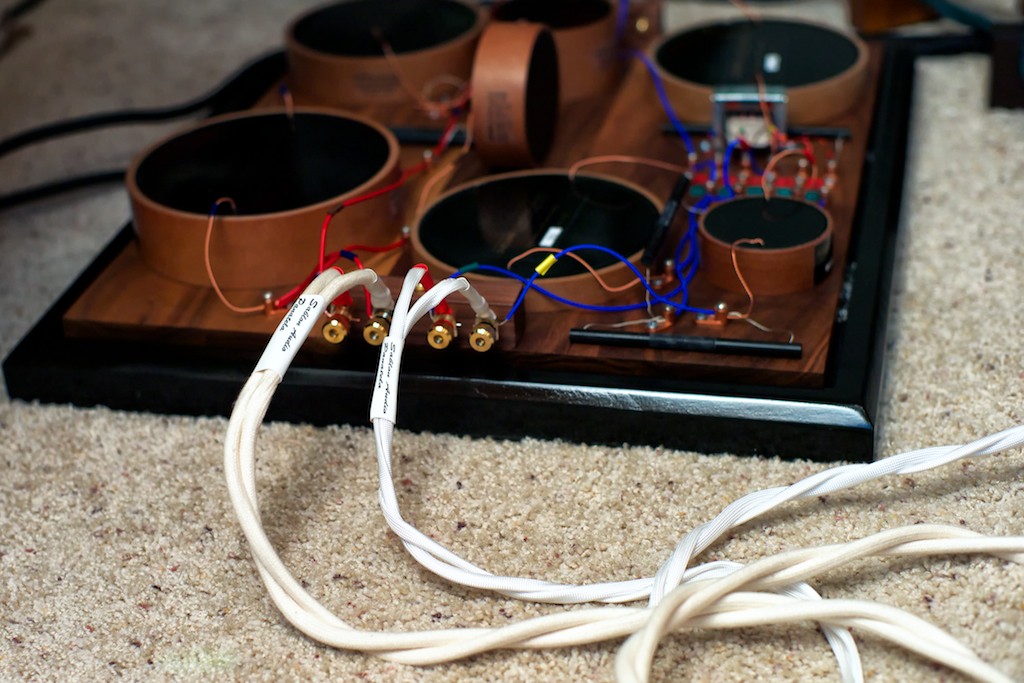
The Panatela low & high-frequency cable sets attach to the binding posts on the Duelund low & high-frequency crossovers using the binding post bypass technique, which uses the binding posts only to clamp the spade connectors directly to the wires of the Duelund crossover, so there is no signal degradation going through the binding posts (for those who don't know, binding posts are a source of significant signal degradation, so it's best bypass them if you can).
Closer ...

Another angle ...
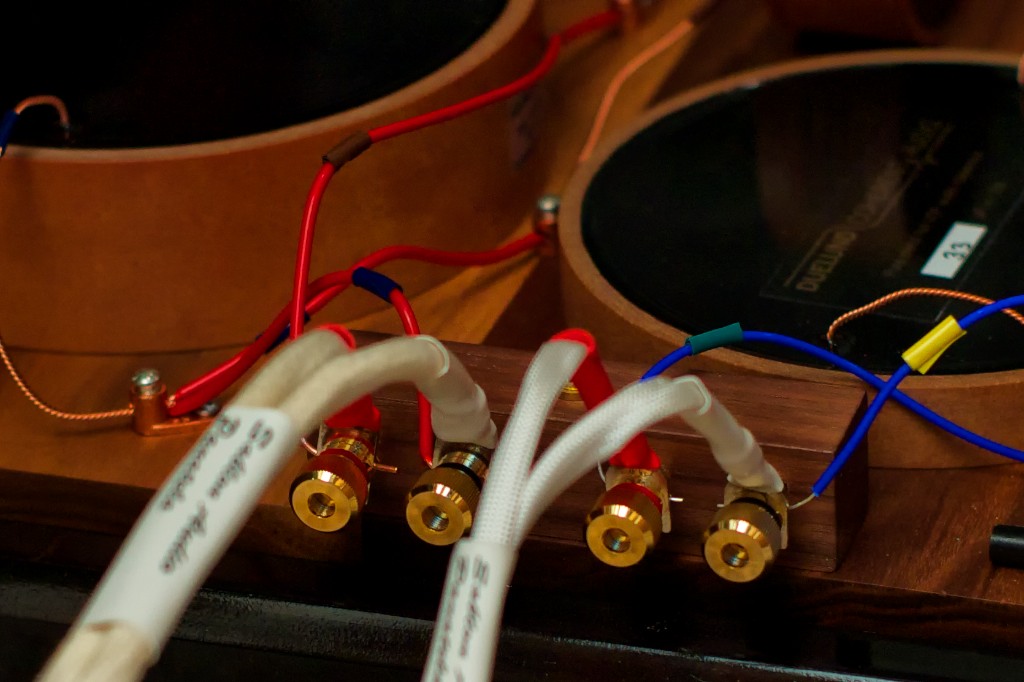
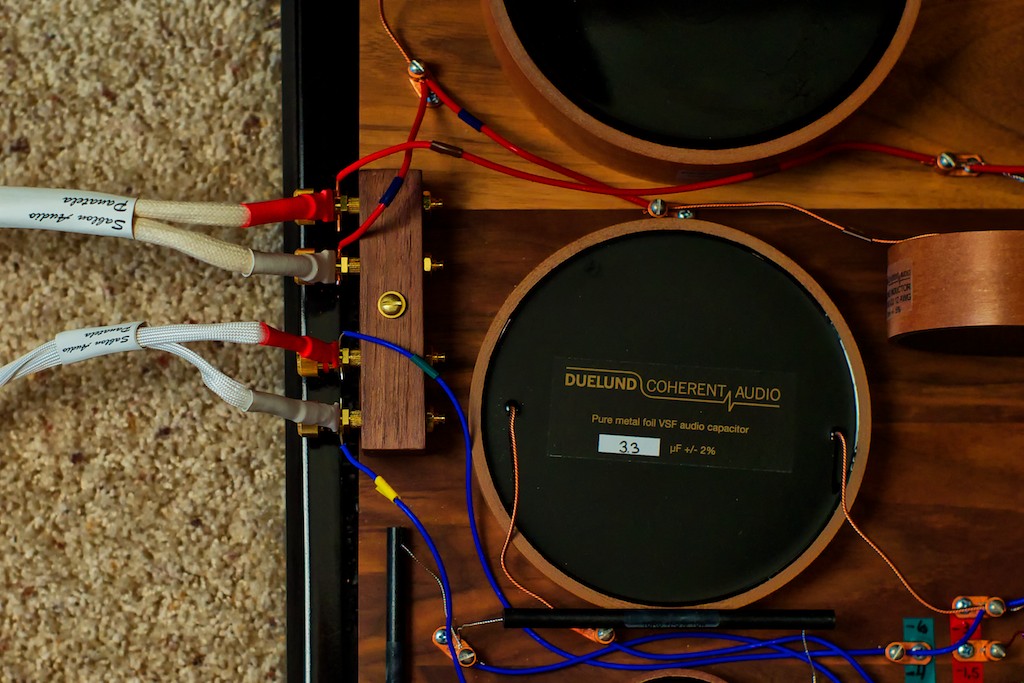
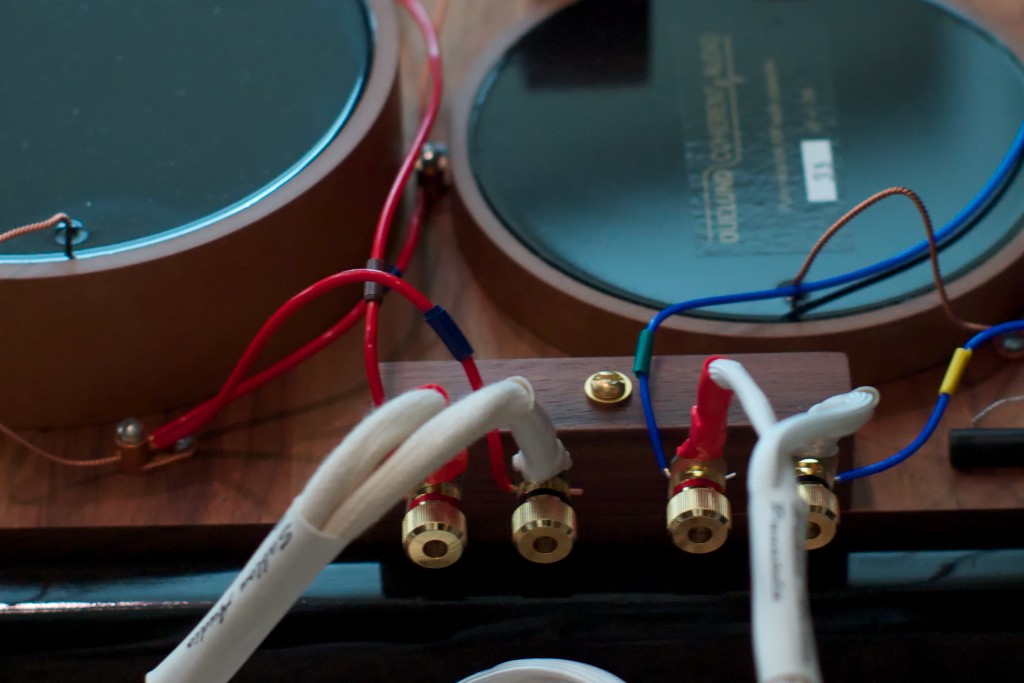
If you look closely at the photo above, the holes through the binding posts are oriented so that they are horizontal to the top surface of the Duelund crossover. The bare Neotech wire from the crossover is inserted through the holes in the binding posts with enough wire present on each side for clamping. The spade connectors are then inserted in front of the wire and the binding post nut is tightened until is smashes the Neotech wire on each side of the clamp into the back of the binding post, clamping it very tightly in place.
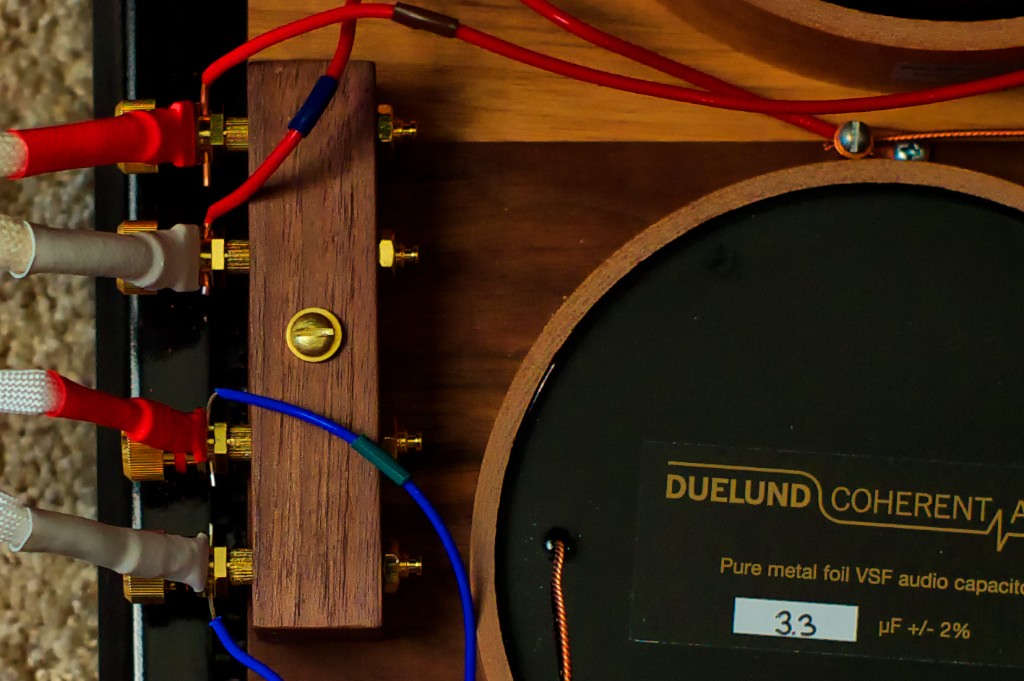
The top-view closeup above shows the order of attachment for bypassing the binding posts: from right to left, the Neotech wire is inserted through the horizontally positioned holes in the binding posts, then the Panatela spade connecter is inserted in front of the wire, then the binding post nut is tightened, clamping the spade and Neotech wire tightly together between the two surfaces of the binding posts.
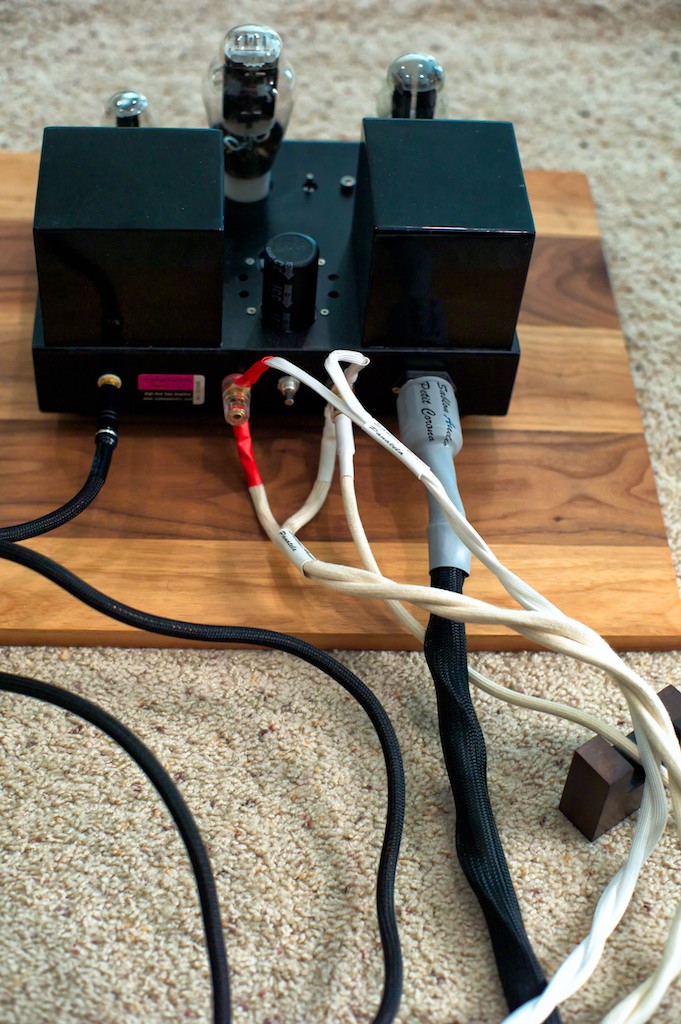
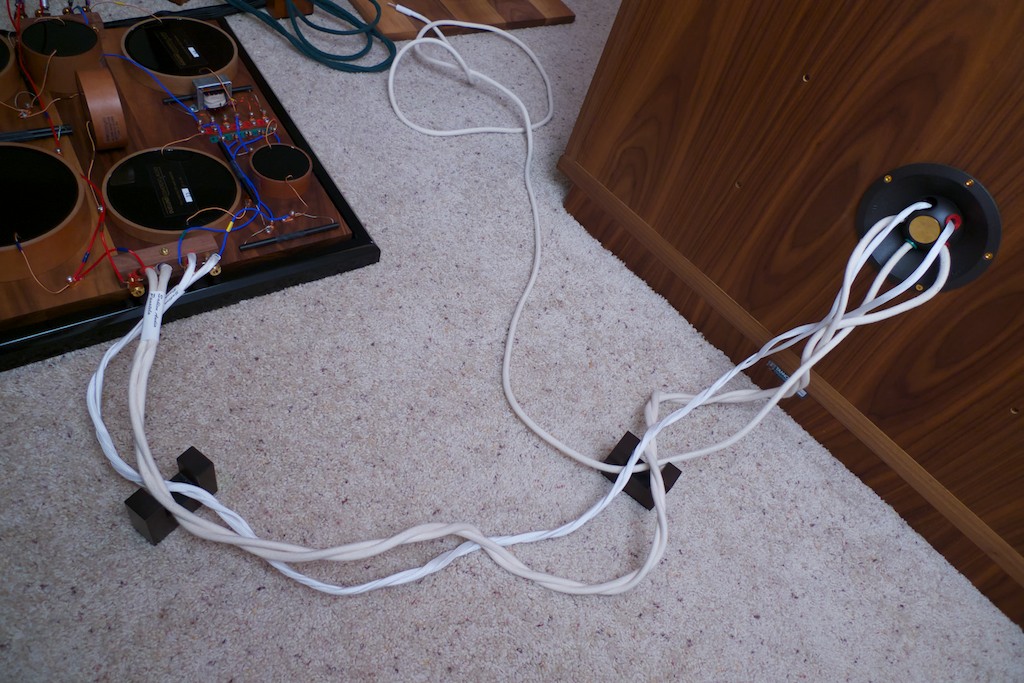
This morning I installed the Panatela cable set that goes from the amplifier to the Duelund external crossover. In the photo above you can see the Panatela high & low-frequency cable sets connected by their spades to the Sophia Electric 91-01 300B mono amplifier, along with the dedicated Panatela ground cable for the Tannoy Dual Concentric speaker connected by a banana connection. Notice also the Sablon Audio Petit Corona power cord that is plugged into the back of the 300B mono - it's a nice match. I'm working on the review for Positive Feedback Online now.

In the photo above you can see the Panatela high & low frequency cable set that is used between the amp and the Duelund high & low-frequency crossovers. You can also see the dedicated ground cable coming in to the amp from the WRSE in lower right-hand side of the photo.
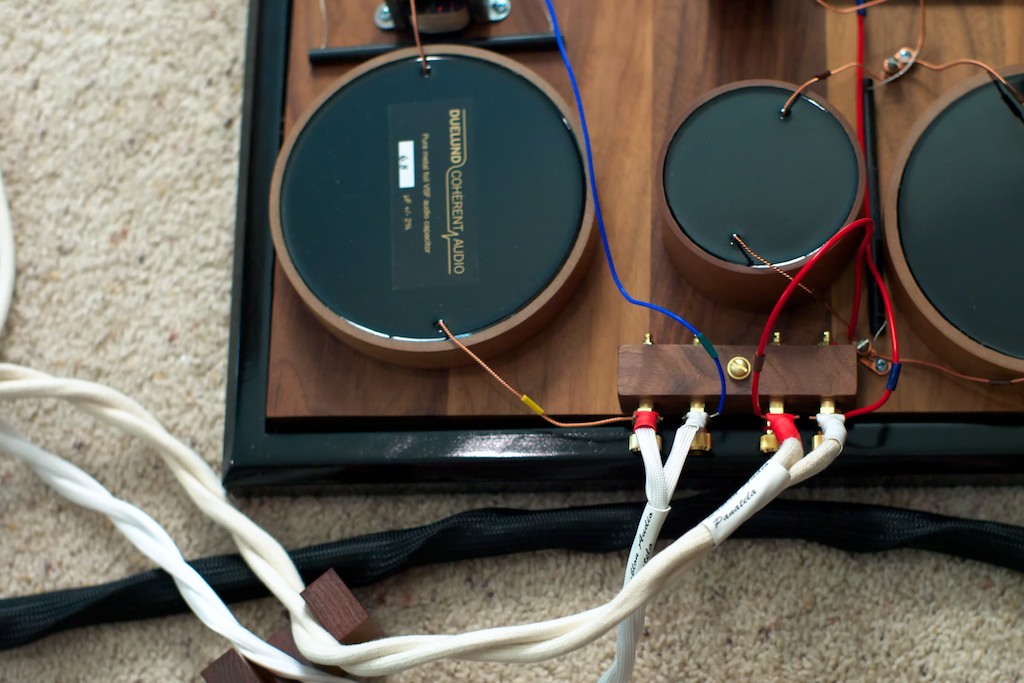
You can see in the photo above that the same binding post bypass method was used on the amp side of the Duelund crossover.
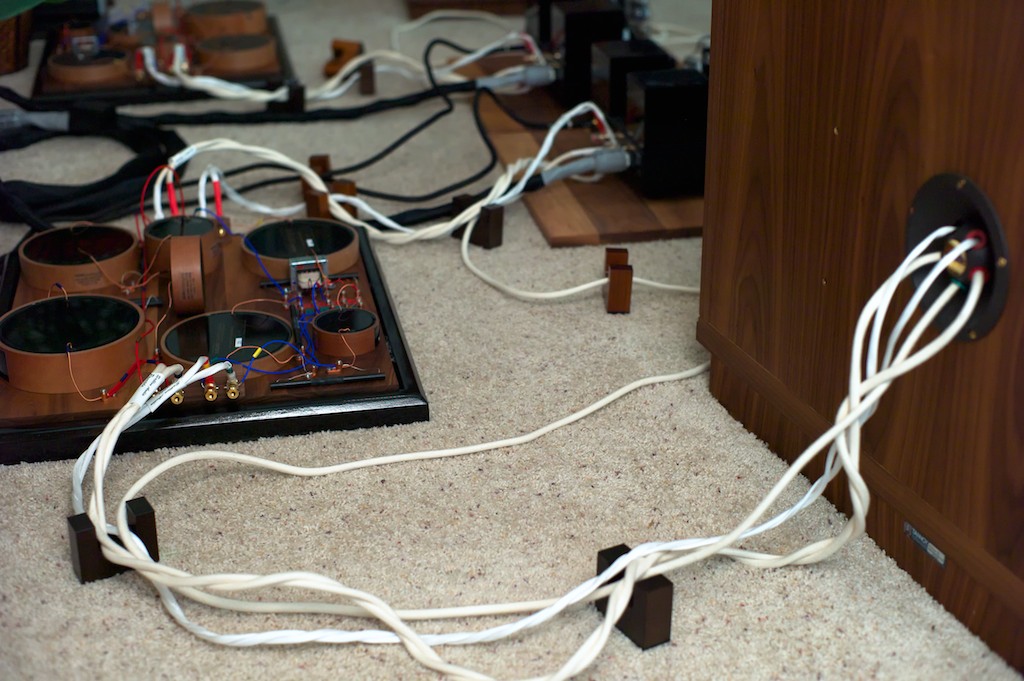
You can see in the photo above that after finishing the installation for the left Westminster Royal SE loudspeaker that there is a continuous run of Panatela from the Dual Concentric driver to the Duelund crossover, and from the Duelund crossover to the amplifier.
As an aside, some of you have been asking for some more comparators for how good the Panatela speaker cables set is (it's really, really, good speaker cable!), and Mark shared this note with me from a customer (Steve) who replaced his Nordost Valhalla with Sablon Audio Panatela:
"I know people occasionally ask you how my cables compare to xyz of the big brands and I thought you might appreciate this recent feedback from a customer who compared the Panatela to his Nordost Valhalla to give some calibration. Steve went on to take delivery of the tweeter cables (mid and tweeter in his case) last week and felt they surpassed his expectations of what could be achieved. Is always good to know our ears aren't deceiving us!
I spent the day wrapping my ears around the sweet sounds of your speaker cables. Ok, are you an audio magician or genius or both? The valhallas I have in bi wire config are the best sounding and most expensive cables I have had in my system, until now.... Your cables even in single wire config make my v's sound dry and analytical as well as forward. Your cables are so much more musical and spacious and warm, they gave me back the low end I was sad to have lost with my new dac. The description that comes to mind is that perhaps the valhallas are engineered around textbook and measurements where yours seem to be engineered around real world audio performance. Needless to say I'm looking forward the the gains from bi wire with yours, I'm also listing my v's on the gon this coming week hoping for a quick sale so I can have you send me magic of my own!
Thank you for opening my ears so to speak.
Steve"
Like I've been saying, if you haven't tried the Panatela speaker cables optimized for your loudspeakers you don't know what you've been missing!
Ok, it's now time for me to start installing the Panatela cables set for my right-channel Westminster Royal SE loudspeaker, so check back for updates after a while. It's going to be an exciting day!
Right Channel Panatela Wiring Updates

First I installed the Panatela low & high-frequency speaker cables set from the 300B mono amp to the amp side of the Duelund low & high-frequency external crossovers for the WRSE. I used the same binding post bypass method described earlier.
Next I attached the Panatela low & high-frequency WRSE internal wiring set of cables to the Duelund low & high-frequency crossovers using the same binding post bypass method.
Closeup from another angle (above).

With the Panatela installed on the WRSE side of the Duelund low & high-frequency crossovers, now it's time to pull the back off the right-channel Westminster Royal SE loudspeaker and get to work - more to come!
Thanks for stopping by!


