


Greetings friends, I hope you are doing well. 🙂
I've been riding an audio high with the latest arrivals from Peter Qvortrup at Audio Note (UK).
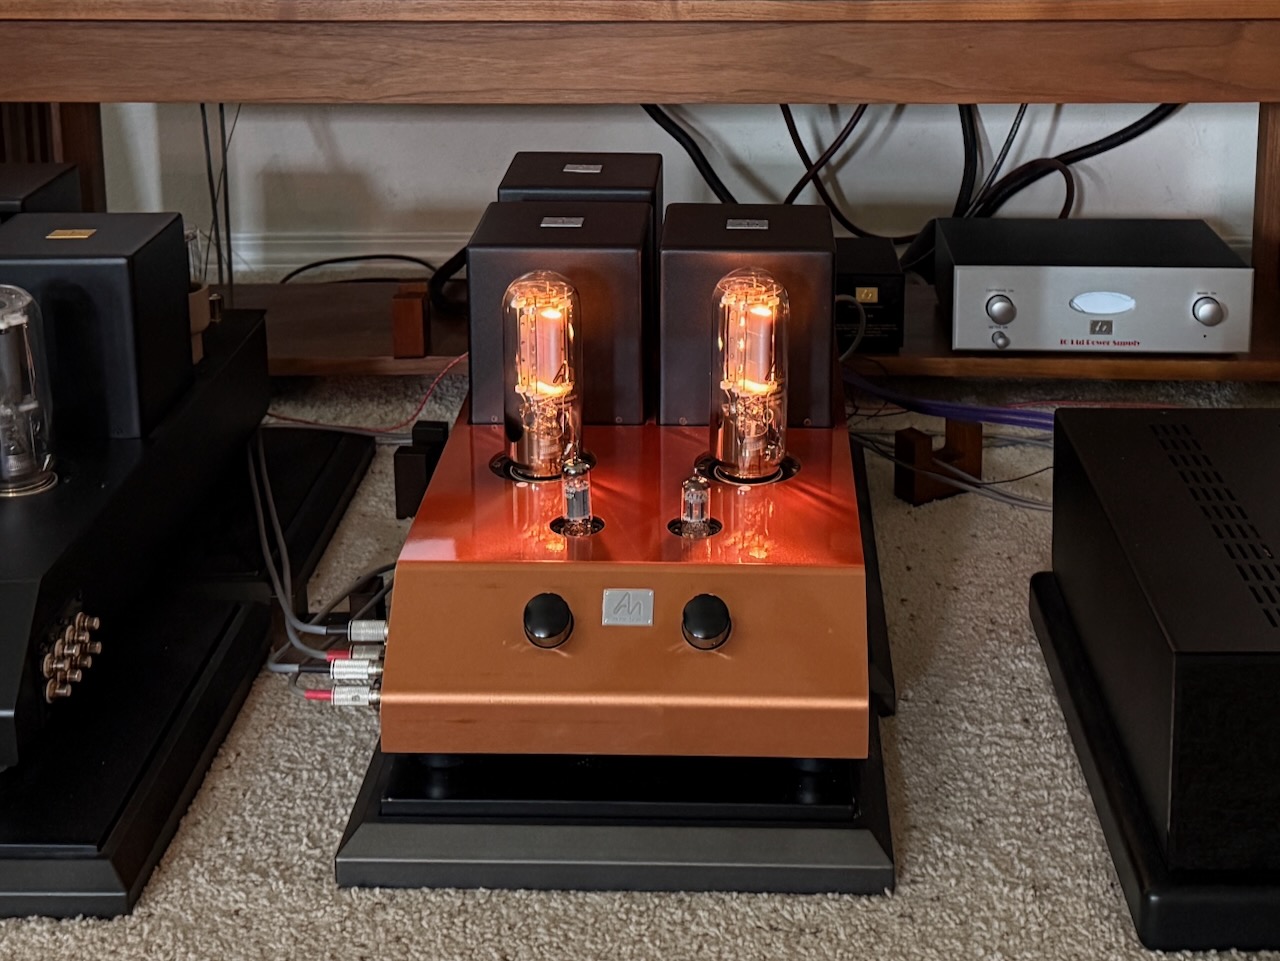
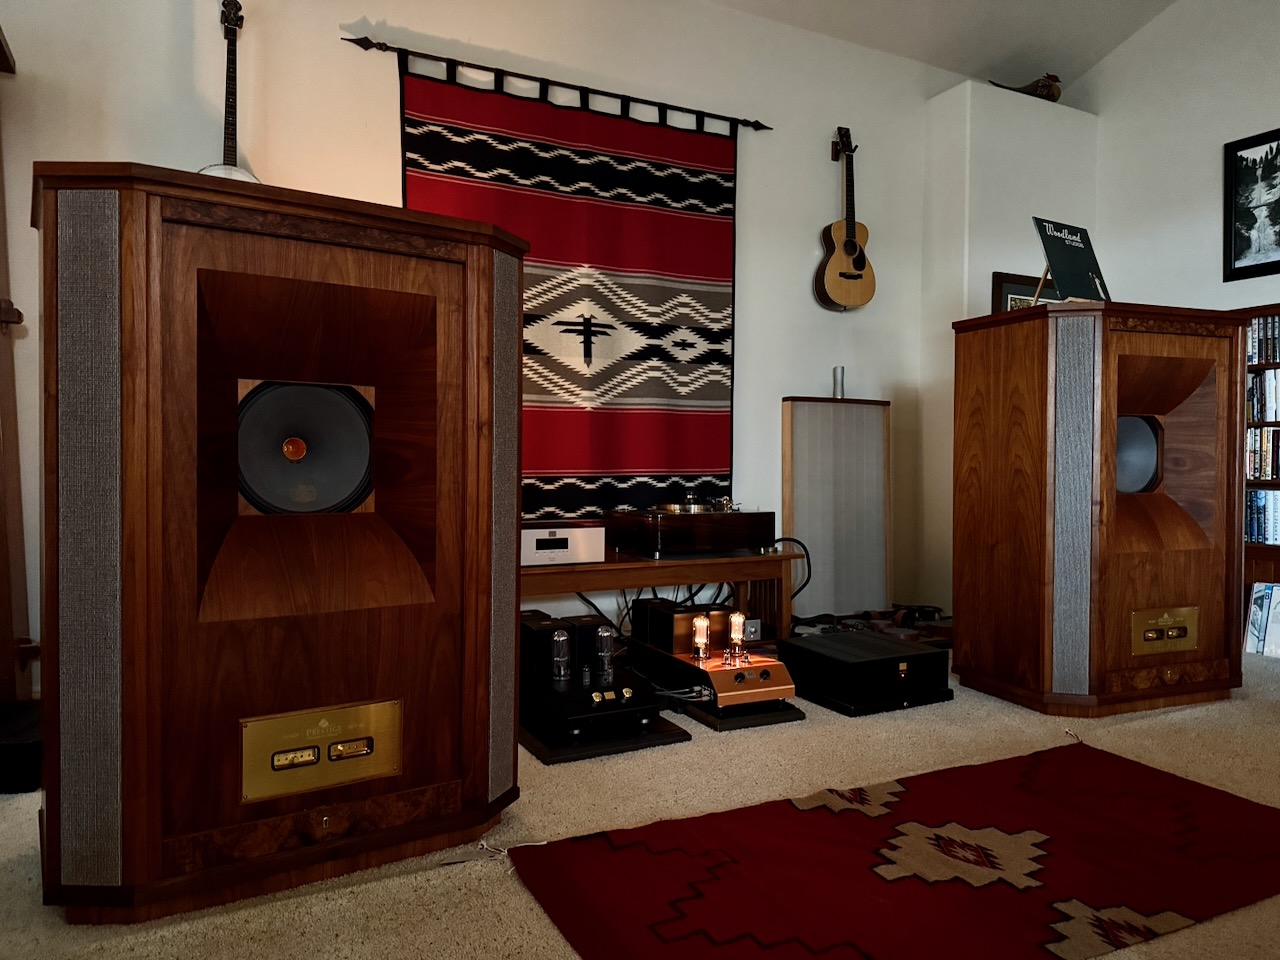
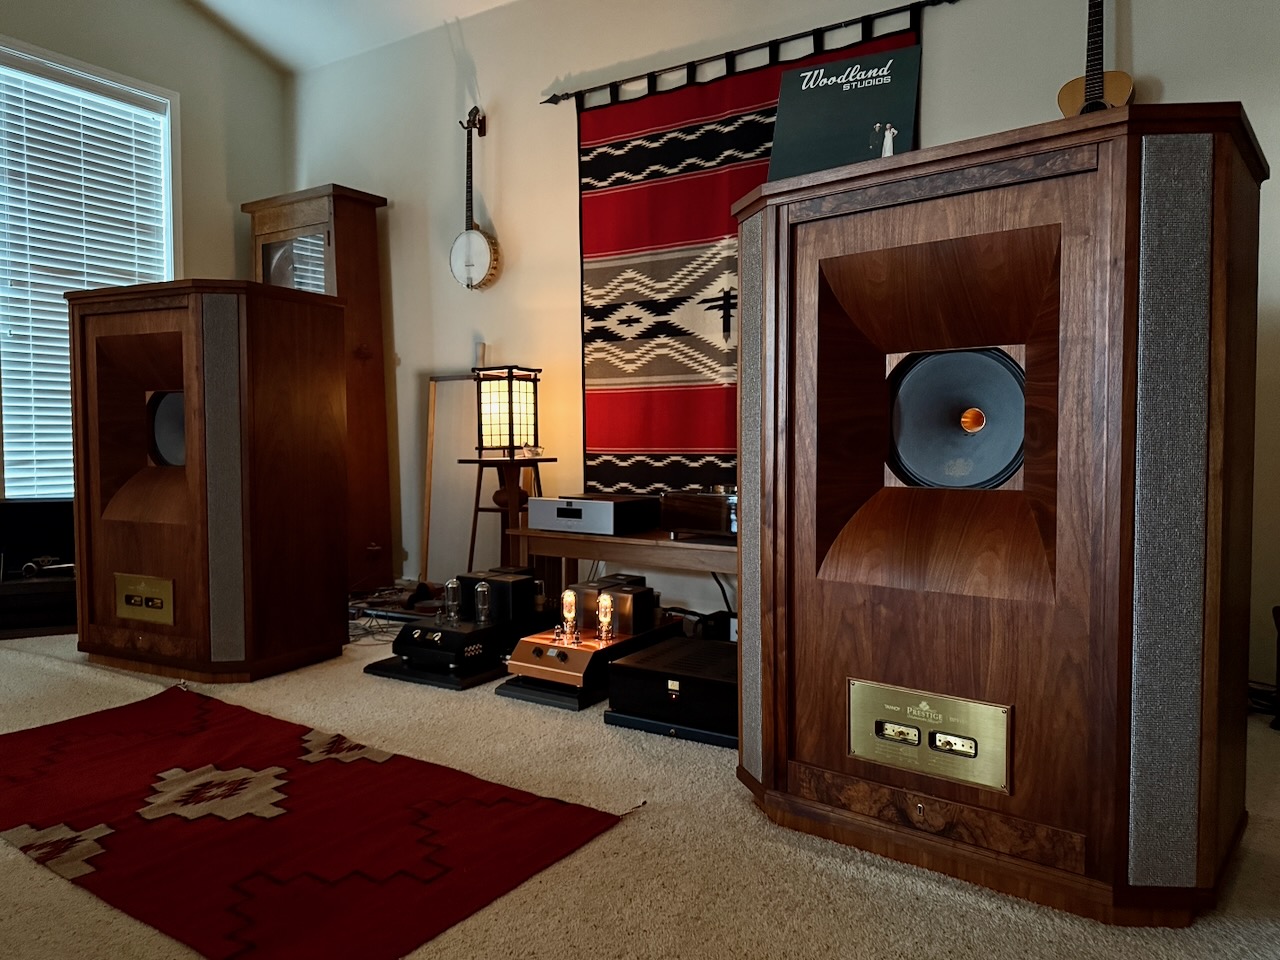
First, the stunning performing all-silver Level 5 Audio Note (UK) Ongaku integrated amplifier arrived (above, more HERE and HERE). I absolutely adore integrated amplifiers, and the Ongaku is the top-of-the-line Audio Note (UK) integrated amplifier. I've got much more to tell you about the Ongaku, so stay tuned for upcoming articles.
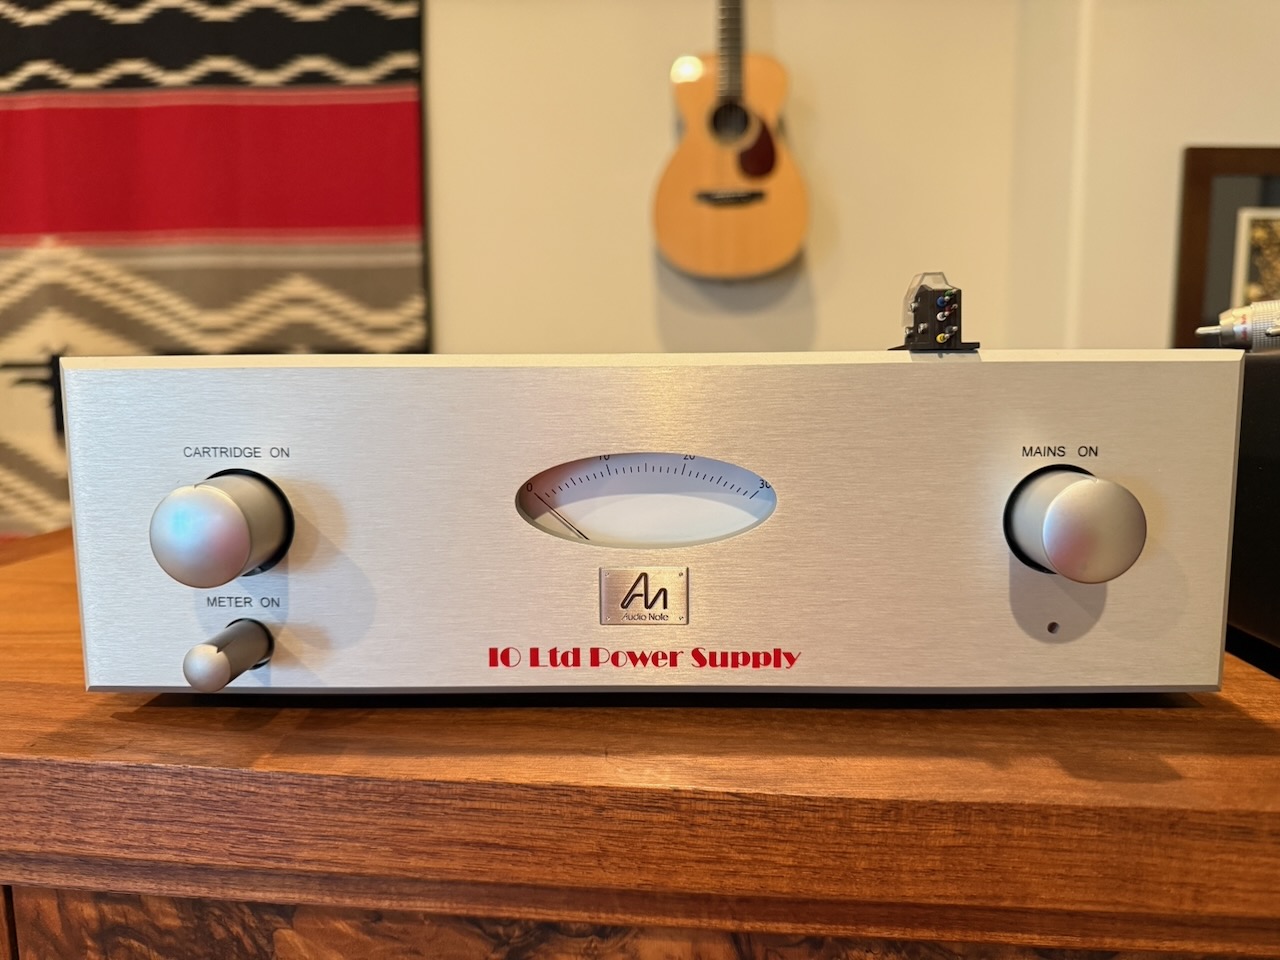
Now the top-of-the-line Audio Note (UK) Io Ltd. field-coil moving-coil phonograph cartridge with power supply has arrived (above).
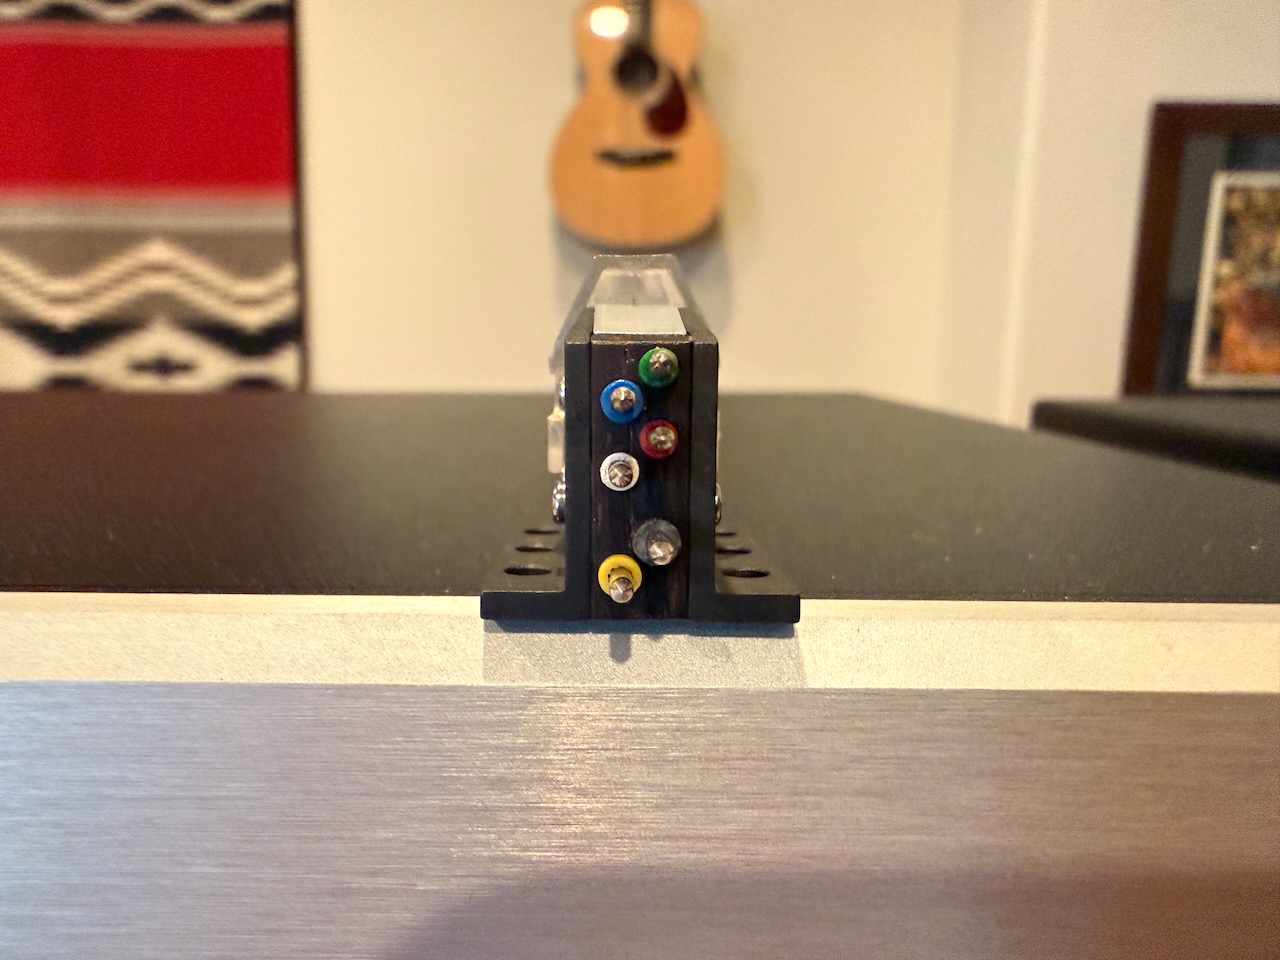
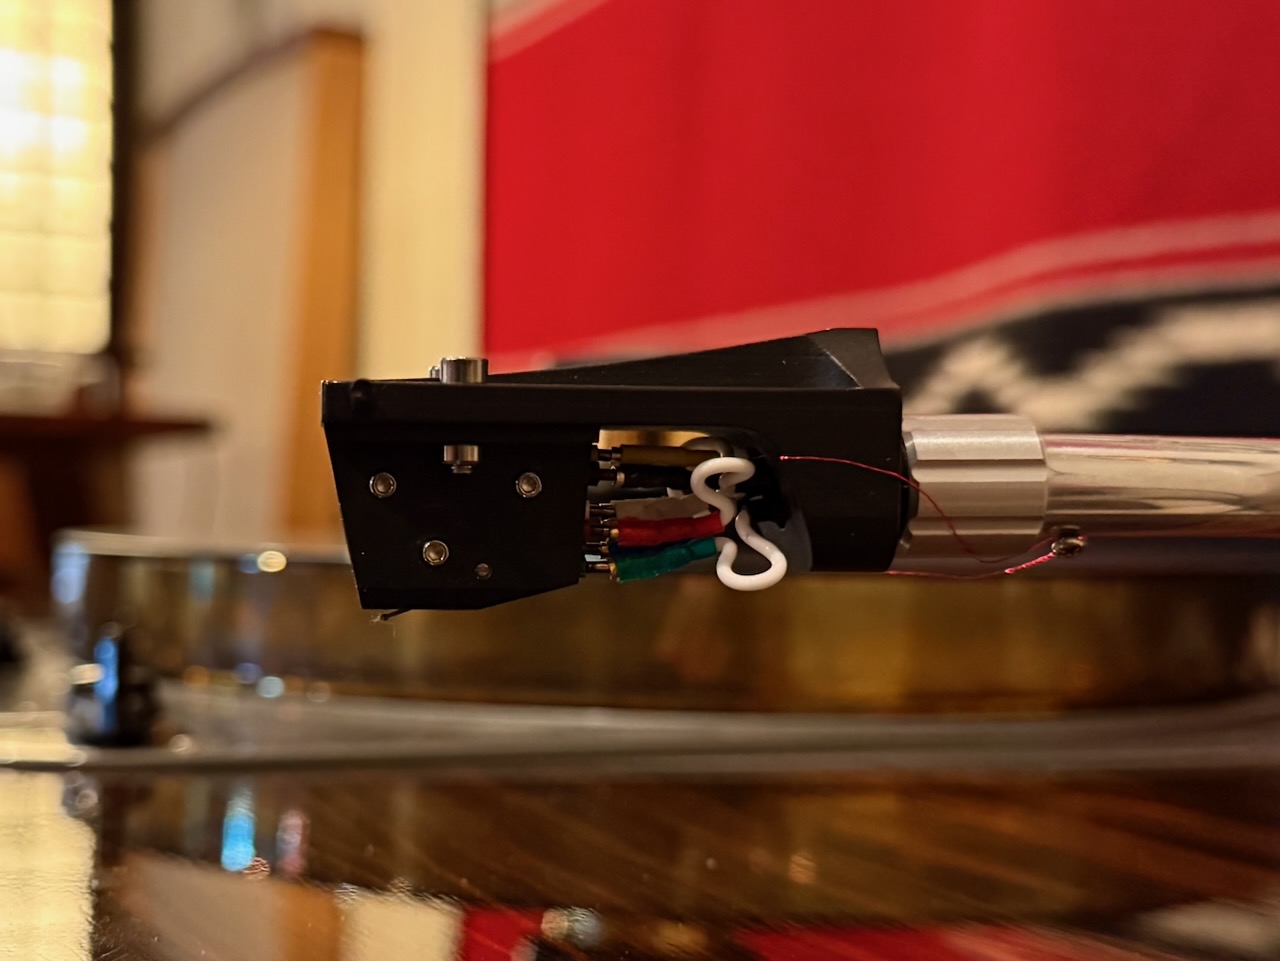
A close-up of the cartridge pins are shown above. Notice the two extra connection pins at the bottom of the cartridge (yellow and black)? The cartridge is upside down, so the pins are actually at the top of the cartridge when mounted on a headshell. Those two extra pins are where the external field-coil power supply connects to the cartridge.
Per the owner's manual: "As the IO Ltd is a field coil design, it requires a DC voltage to generate the internal magnetic field. To receive this voltage from the external power supply unit, the cartridge is equipped with an additional pair of connection pins, located at the top / rear of the cartridge body."
That's the field-coil power supply in the photo above. I haven't put it on a scale yet, but it's hefty. It feels like the power supply weighs as much as some integrated amplifiers do.
"To connect these pins to the external power supply unit, an additional pair of internal (or external) arm wires and a two core / twisted pair external arm cable of suitable length (to reach the external power supply unit) will be required."
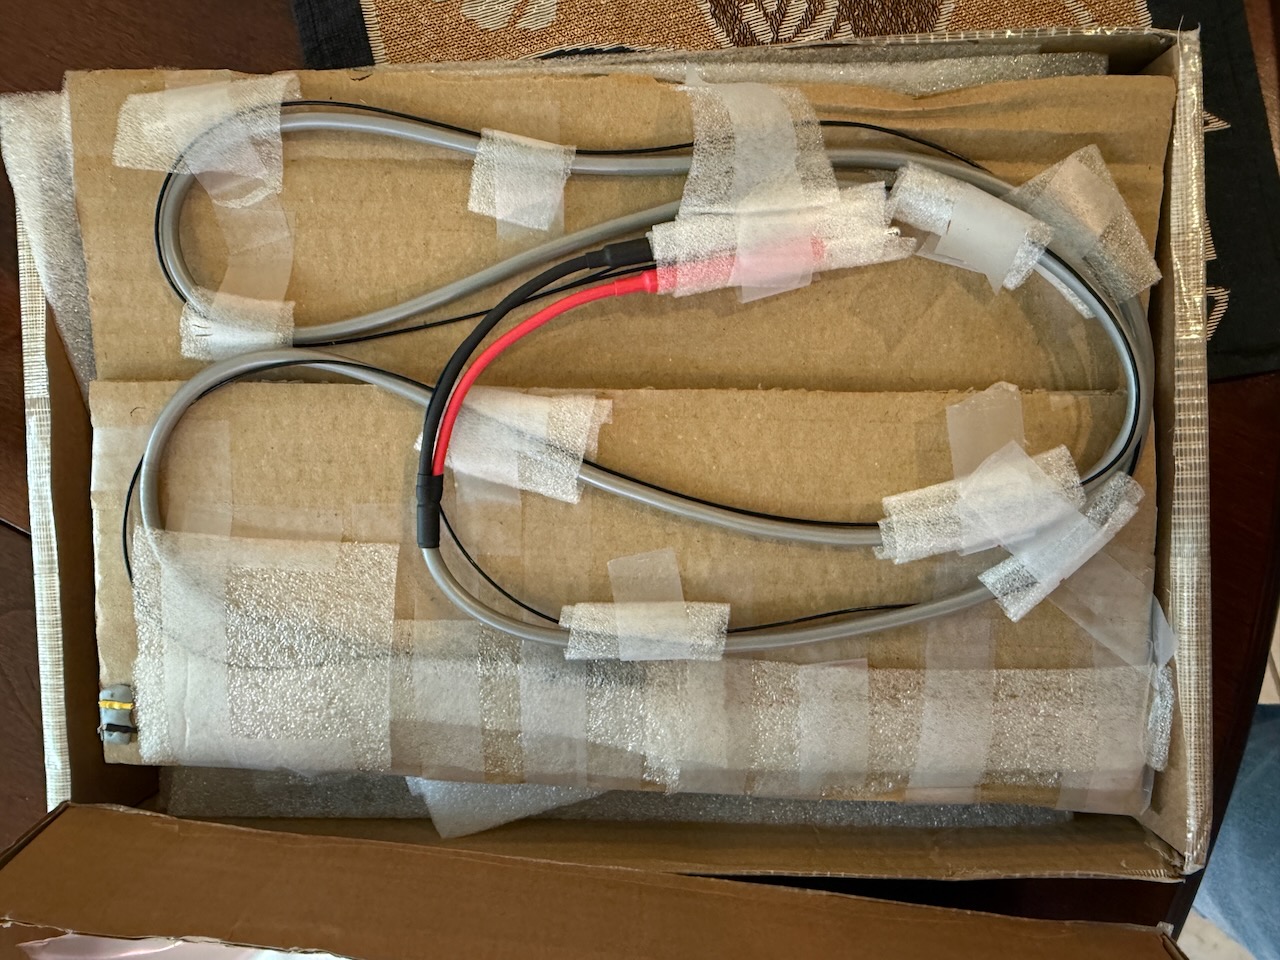
Audio Note (UK) built me a beautiful set of external arm wires to use with my 12-inch Schick tonearm, and they were very carefully packed to protect the very fine wires that traverse the exterior of the tonearm and connect to the pins on the top rear of the Io Ltd cartridge body.
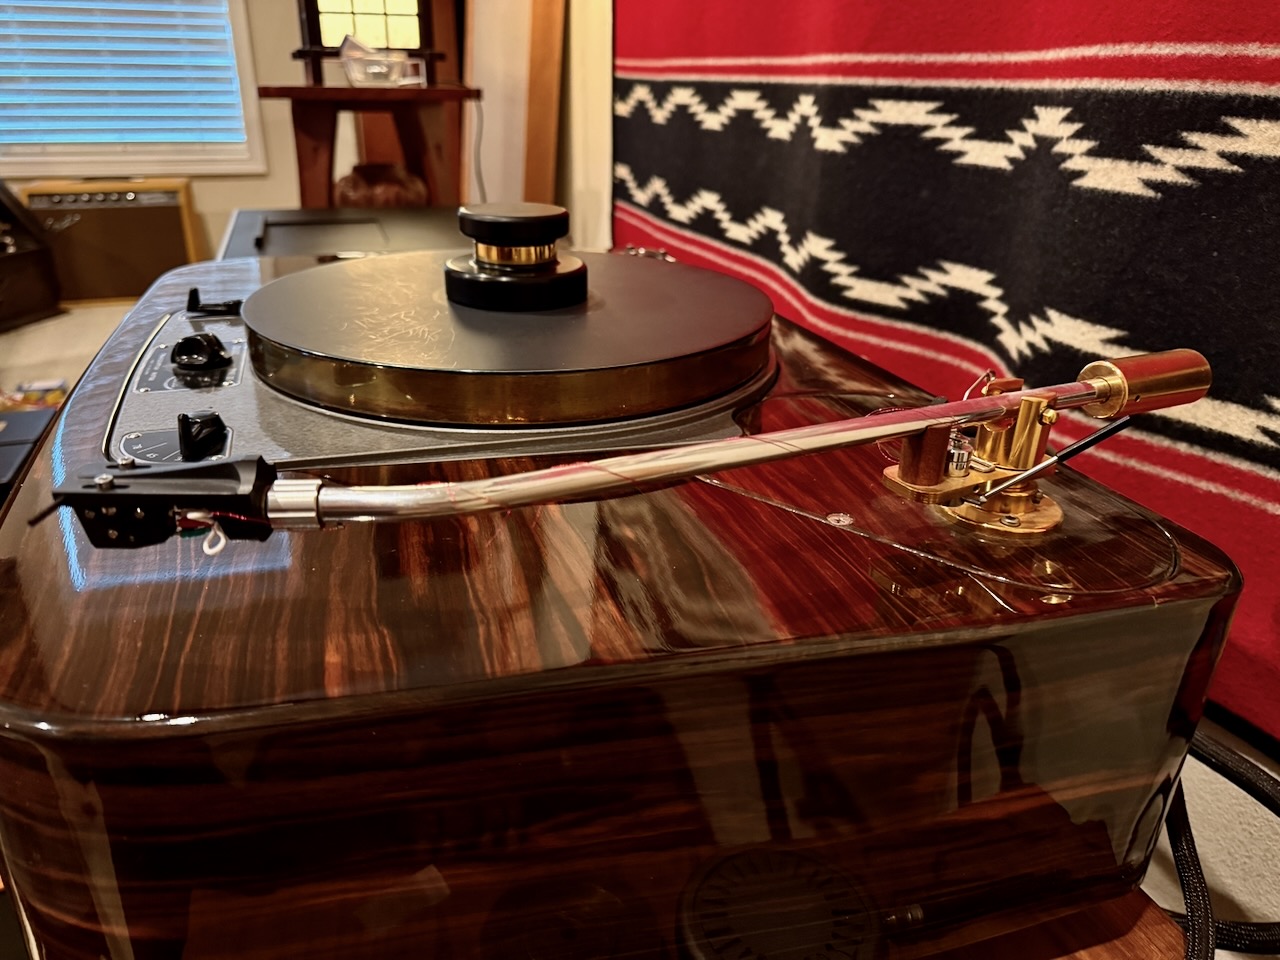
The field-coil power supply wires that traverse the tonearm to connect to the Io Ltd.'s pins are so fine that it is hard to see them in the photo above. If you look closely you'll see them exiting towards the back of the headshell and spiraling down the arm tube, and disappearing as they connect to the field-coil power supply.
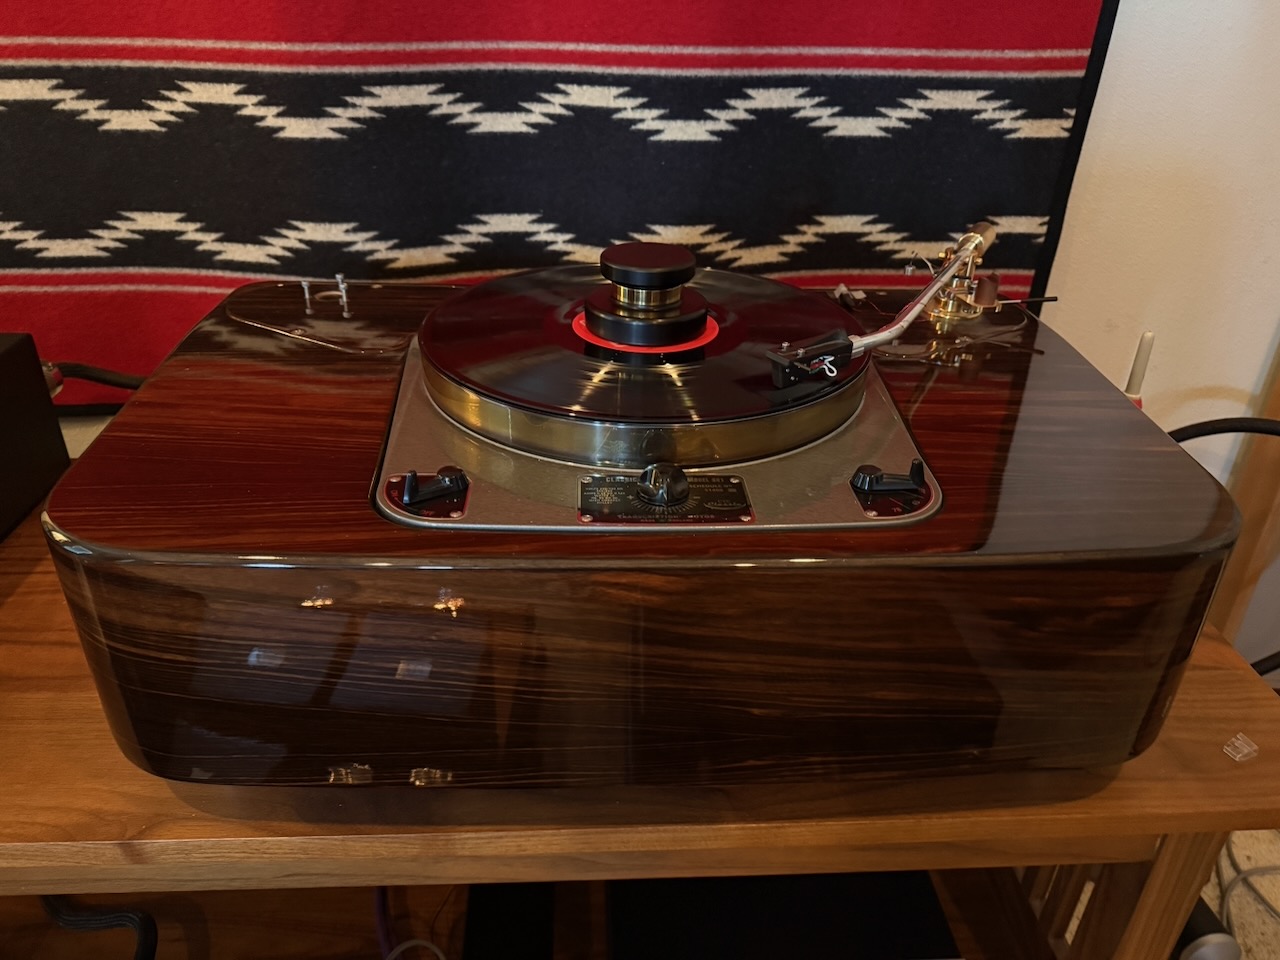
A note about the turntable: My turntable is Classic Turntable Company Classic 301 motor assembly equipped with an oversize high-mass (12kg) brass platter, mounted in a high-mass Artisan Fidelity plinth fitted with Stillpoints Ultra SS footers. I use a SPEC AP-UD1 Analog Disc Sheet (turntable mat) on the brass platter, a Thomas Schick 12-inch tonearm - rewired with silver wire - is mounted on the plinth’s armboard, and a Thomas Schick graphite headshell equipped with Acoustic Revive hybrid silver-copper PC-TripleC/EX headshell leads rounds out connections to the Io Ltd FC MC phono cartridge.
After installing the Io Ltd on the Schick graphite headshell I went through the process of getting it dialed-in. The first step was setting the tracking weight to 2.5 gram, and then doing the cartridge alignment.

Setting up the power supply was the next step, and the excerpt from the manual above really got my attention!
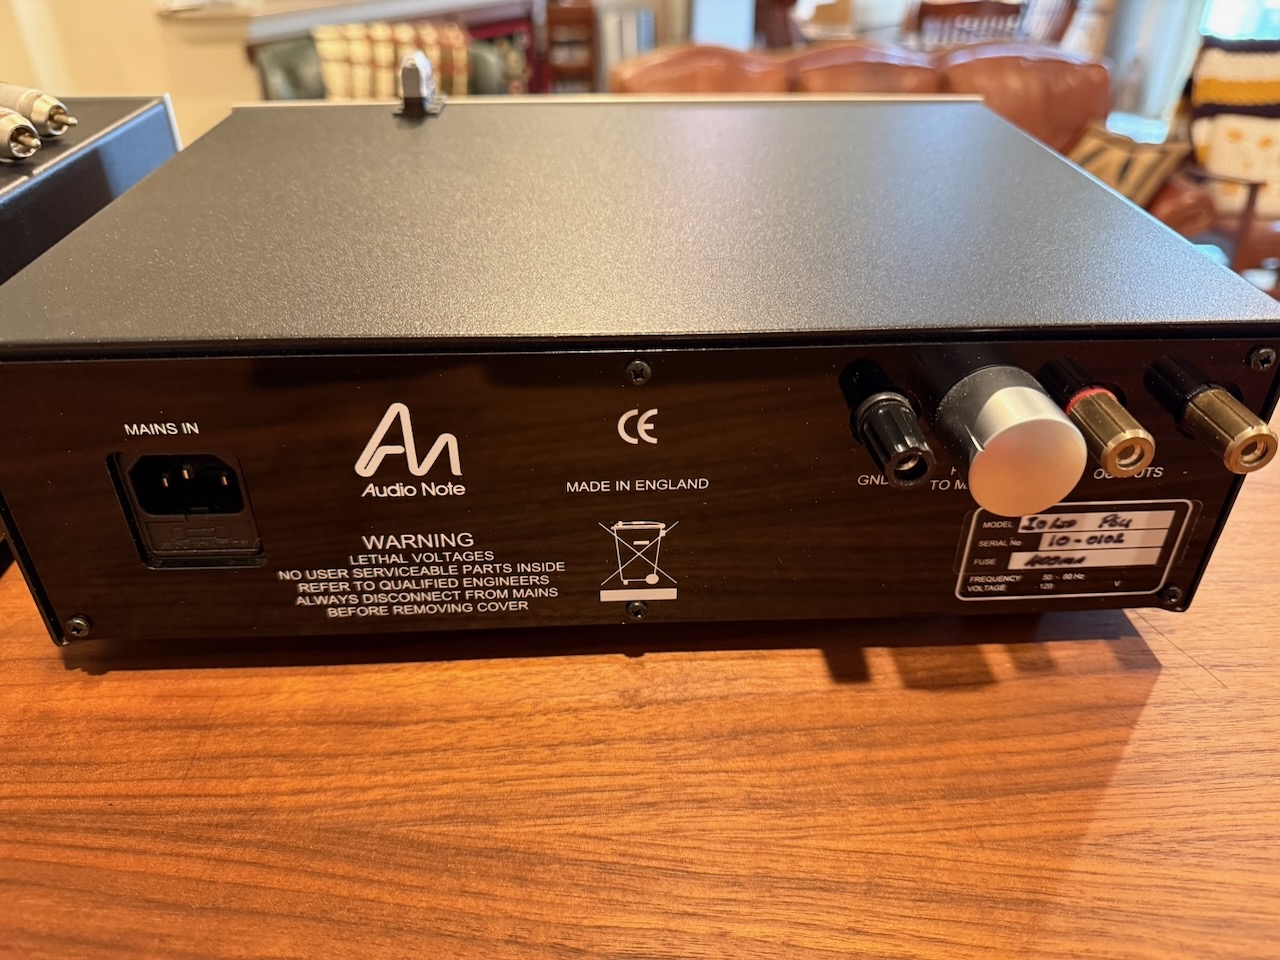
In the photo above you can see the back side of the Io Ltd field-coil power supply. From left to right you see the mains in connection for the wall AC, then the ground connection for the field-coil wire harness, then the knob for the cartridge voltage potentiometer, and finally the banana connections for the wiring harness.
In preparation for setting the cartridge voltage, as a precautionary step I set the cartridge voltage potentiometer to its lowest setting by rotating it fully clockwise.
Then after hooking up the ground wire, plugging-in the banana connectors for the wiring harness, I then attached the Acoustic Revive Absolute power cord.
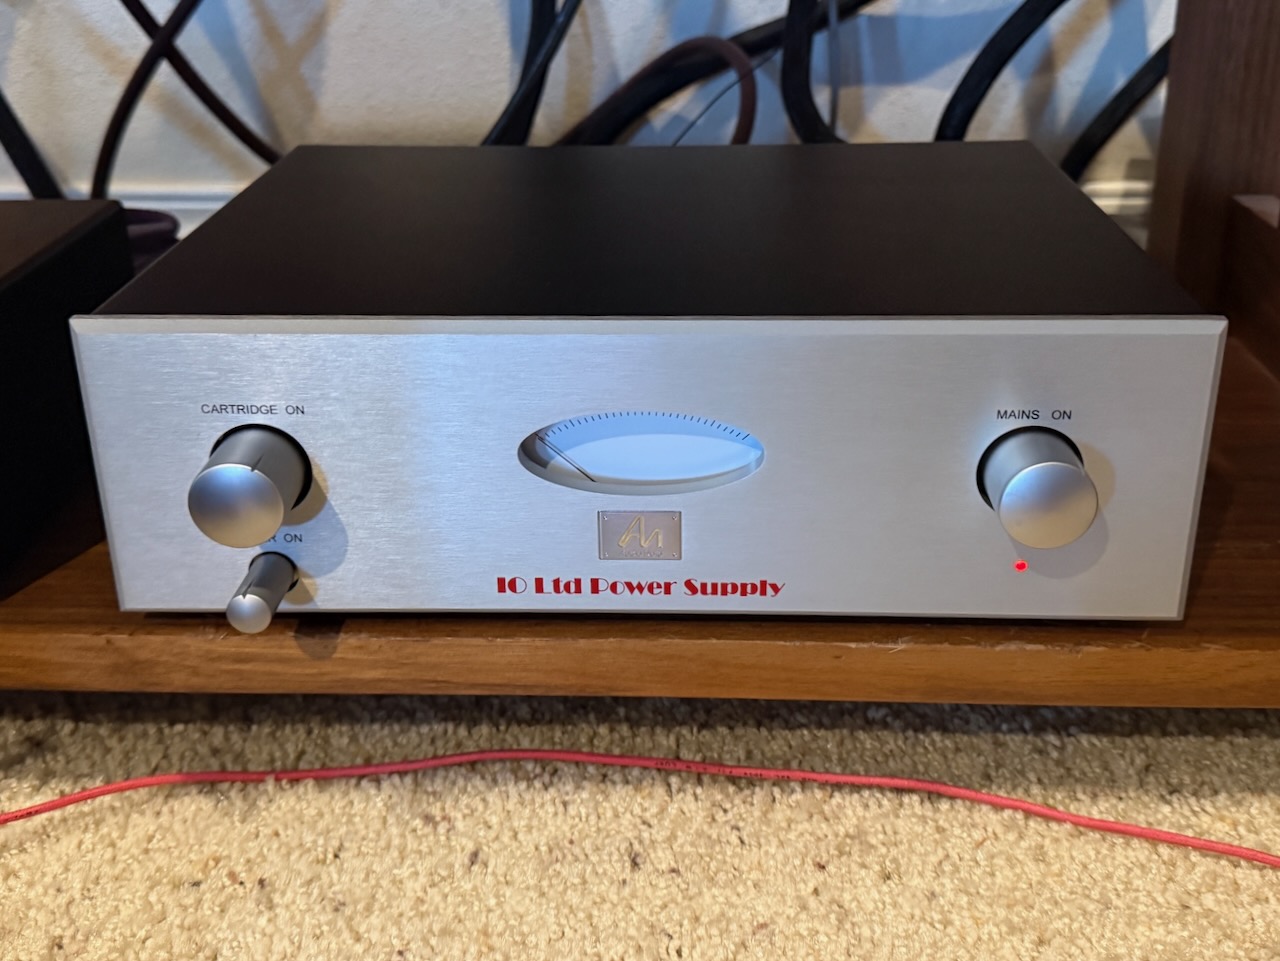
Then I followed the procedure in the owner's manual: "Once connected, turn the unit on using the ‘Mains On’ switch, located on the right hand side of the front fascia. Turn the switch clockwise / right. The red ‘power’ LED situated below the ‘Mains On’ switch should glow RED."
"Next, switch on the meter using the ‘Meter’ switch, located on the lower left hand side of the front fascia. Turn the switch clockwise / right."
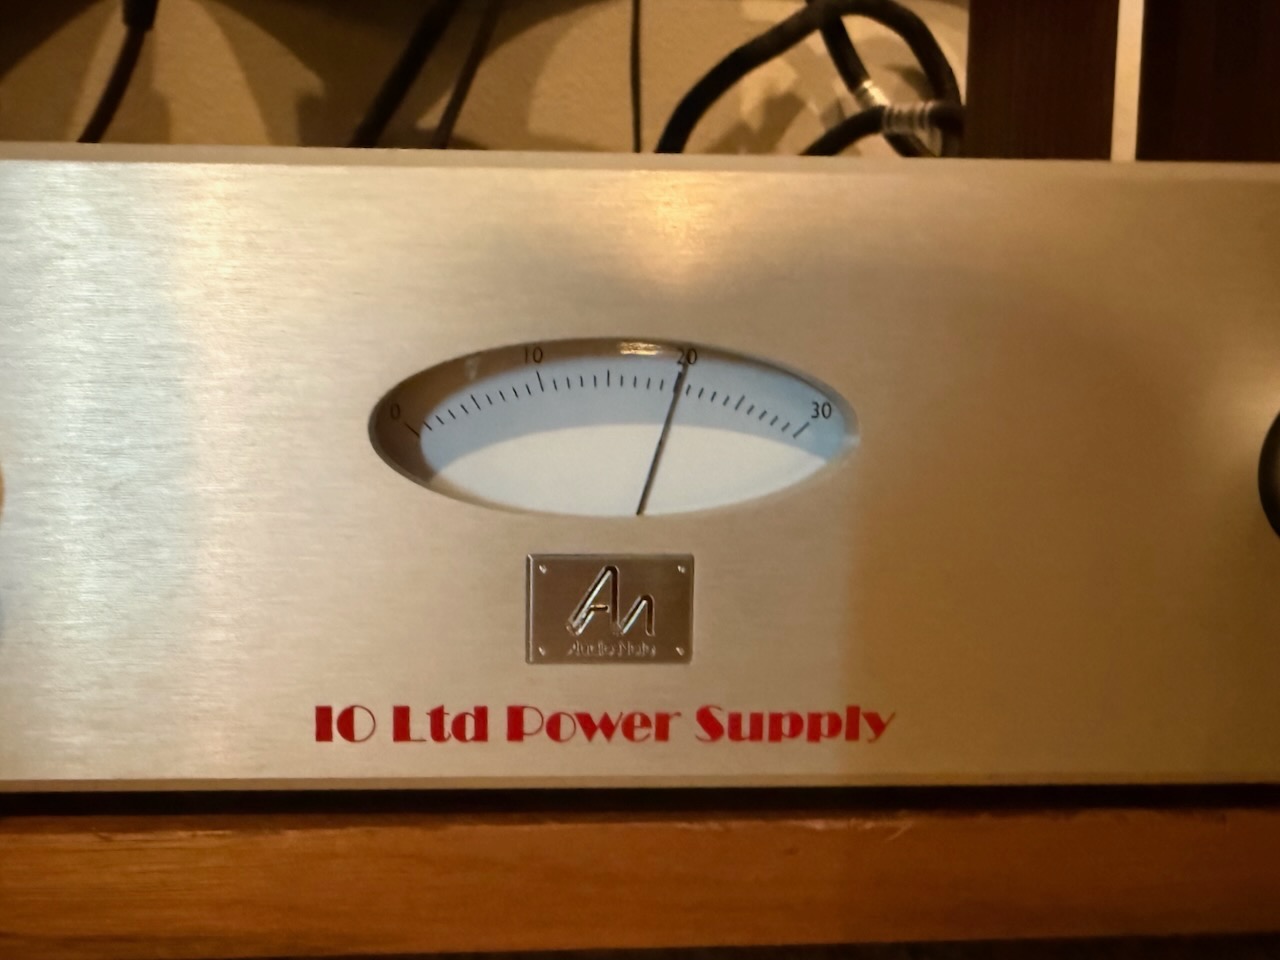
"At this stage the meter on the front of the power supply unit should show a reading of 1.8V DC – 2.0V DC (divide the value on the meter scale by 10)."
You can see in the photo above that the meter was reading almost exactly 2.oV DC.
"Turn the cartridge supply on using the ‘Cartridge On’ switch, located on the left hand side of the front fascia. Turn the switch clockwise / right. With an accurate voltmeter set to the 2V DC scale, measure the voltage at the PSU connection pins on the cartridge."

I got out my trusty voltmeter and set it to the 2V DC scale, and noting the scary warning above, I got out my Bausch & Lomb Magna Visor to make sure I could see everything magnified for an accurate placement of the probe tips on the cartridge's field-coil pins.

"The voltage at the PSU connection pins on the cartridge should be in the region of 1.2V DC to 1.3V DC."
So then I turned on "cartridge on" switch and very carefully placed the voltmeter probe tips on the cartridge's field-coil pins and saw that the voltage reading was about 1.2V DC. Breathing a big sigh of relief that I hadn't accidentally shorted the pins with the probes, I proceeded to the next step of the setup procedure.
"If the voltage is within the required region, proceed to the next section of this manual entitled ‘OPERATION’. If it is higher or lower than required, the voltage must be adjusted as follows ..."
I was glad that I had set the cartridge voltage potentiometer to its lowest value before starting the voltage adjustments, as that turned out to be just right for the correct voltage.
I turned off the "cartridge on," "meter on," and "mains on" switches, then proceeded to the "operation" portion of the owners manual and followed the steps to get the cartridge fully operational.
After reading carefully through the procedure in the manual, I turned on the "mains on" switch, which was accompanied by a red LED light illuminating.
Then I turned on the "cartridge on" switch to power up the field-coil of the Io Ltd cartridge, followed by turning on the "meter on" switch.
"The meter allows the user to monitor the approximate voltage being supplied to the cartridge. With the cartridge turned on (see Cartridge On above) and the meter turned on (see Meter On above) the meter should read approximately 1.2 V DC to 1.4 V DC."
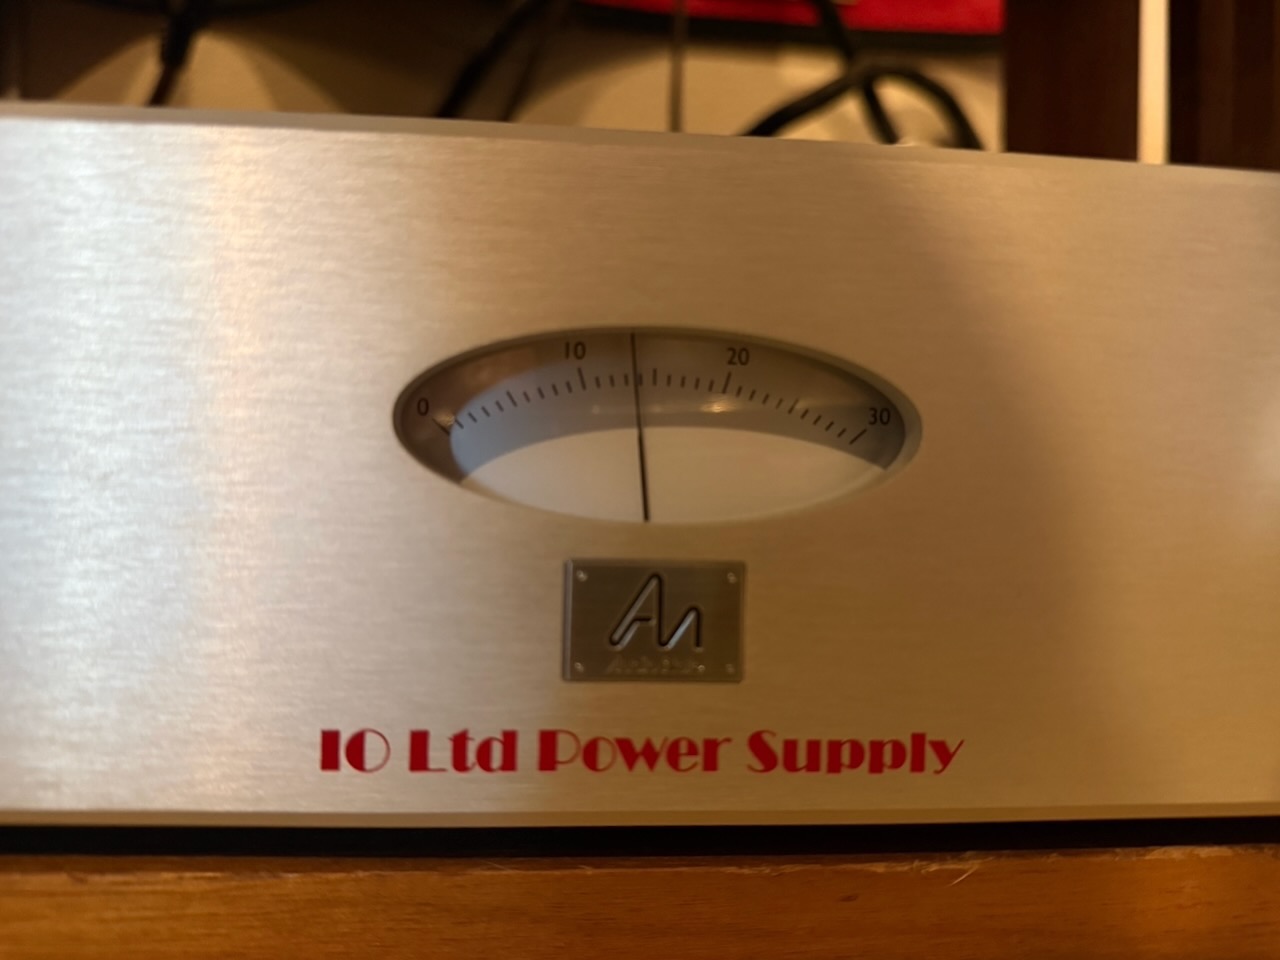
The meter read just a touch below 1.4V DC, so it was in the proper range.
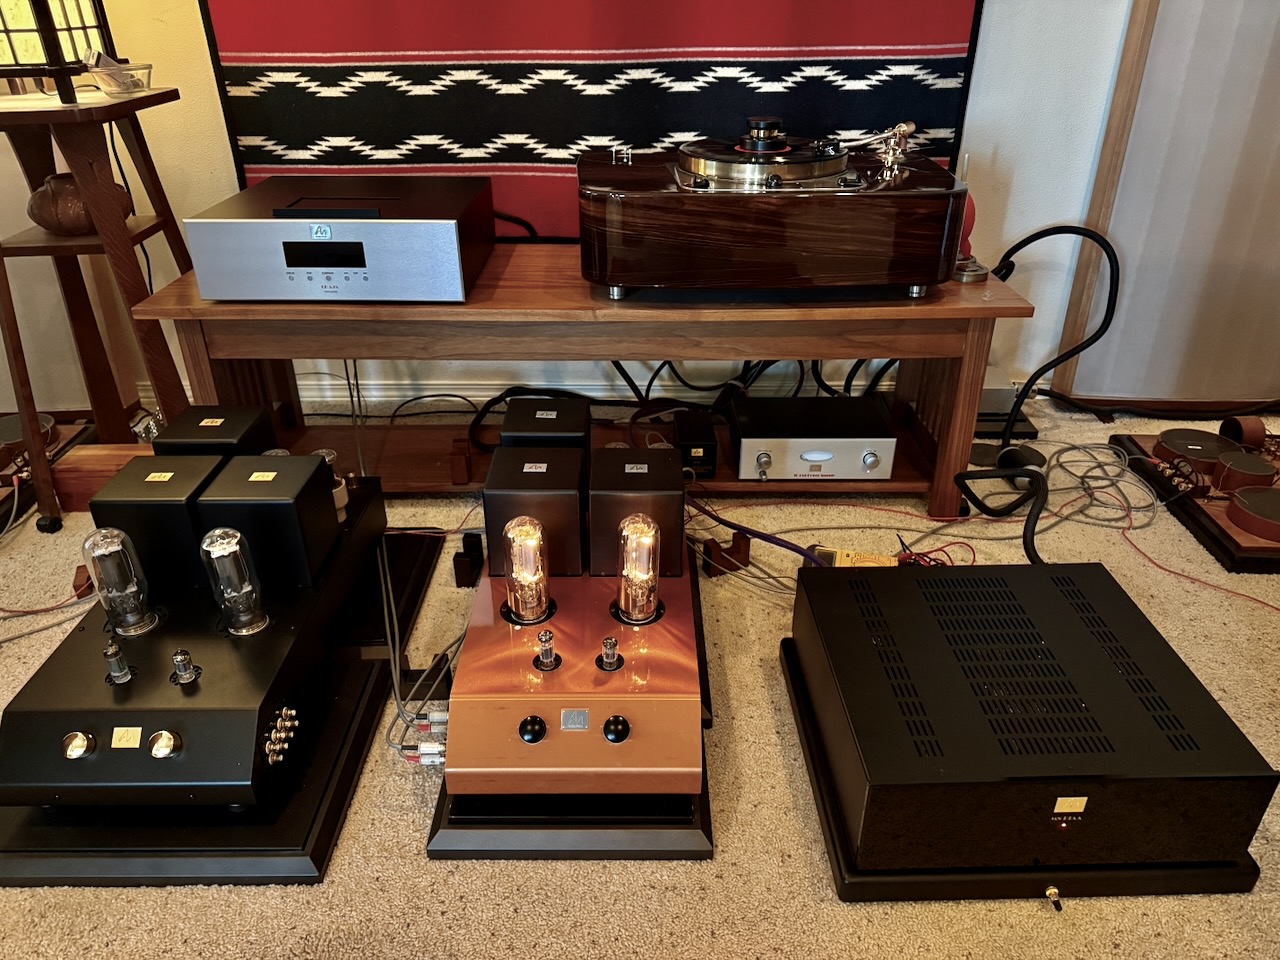
After breathing a sigh of relief that the setup went as it was supposed to without any mishaps, I powered up the Level 5 all-silver Ongaku and the Level 5 all-silver M8 RIAA phono stage, and let them warm up for a little music listening.
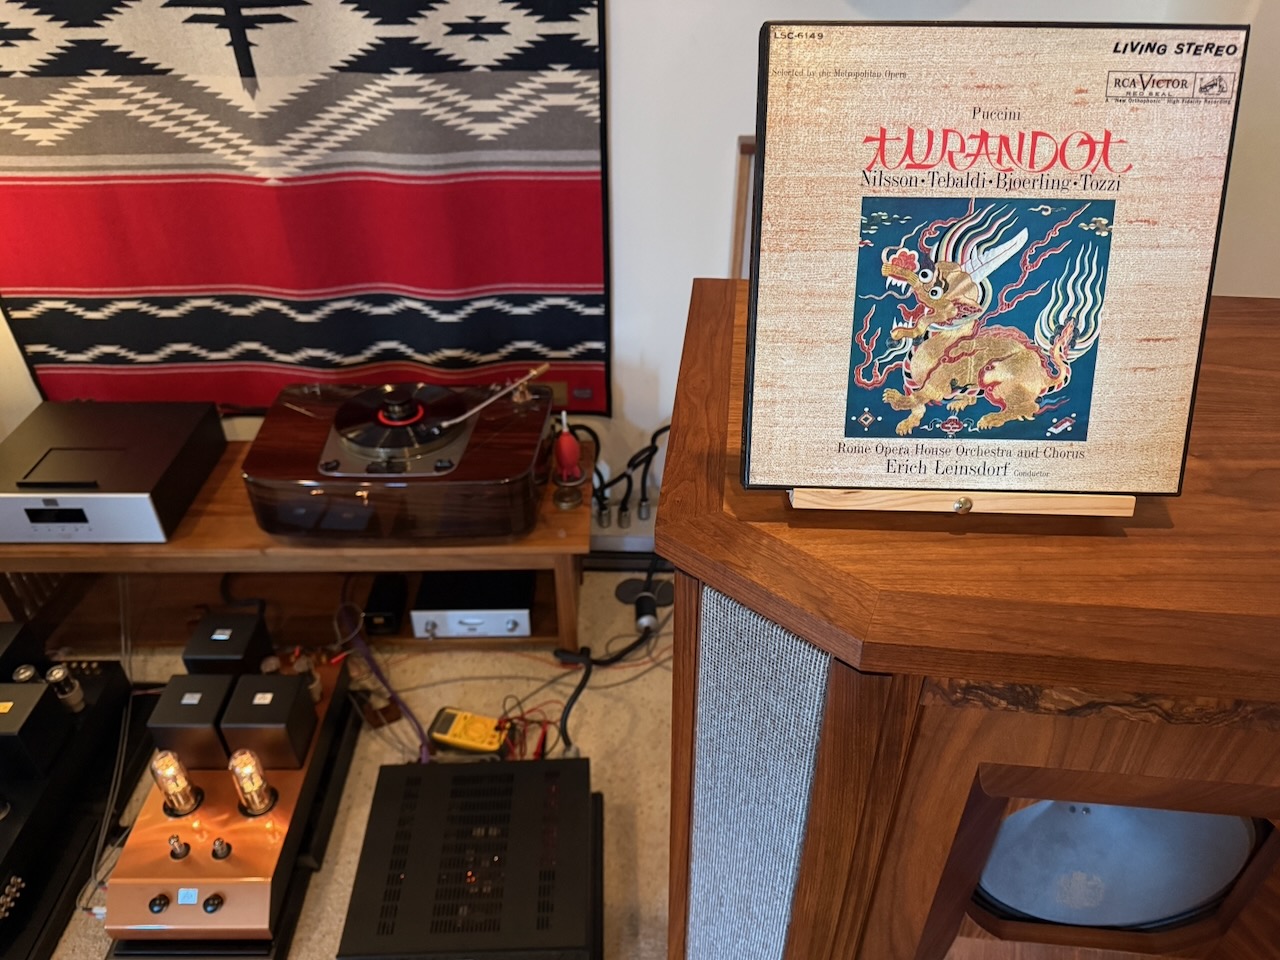
I got out my vintage 3 LP box set (1960) of the renowned RCA Living Stereo version of Puccini's Turandot opera (Nilsson / Tebaldi / Björling / Tozzi / Leinsdorf Rome Opera Orchestra and Chorus) and put the first LP on.
I'm of the opinion that opera is the ultimate musical test for audio kit. Opera is a "theatrical art form" combining music, singing, and dramatic storylines. It's amazing to attend live opera and be part of the experience, there's nothing quite like it, and its amazing to hear when played back through a first rate audio system.
When playing these LPs that were recorded during the peak performance of the stereo magnetic recording era, with their extremely wide dynamic range, the dramatic portrayal of singers moving about on the stage, the choir, and the orchestra all add to the complexity of playback, and the combination of the Io Ltd FC MC phono cartridge, AN-S8 SUT, M8 RIAA phono pre, and Ongaku driving my West's delivered a Turandot that was absolutely stunning.
It is going to take some doing to articulate the performance of this combination of kit, and the subject of this post, the Io Ltd field-coil moving-coil phonograph cartridge.
My first reaction was "Oh my god ... wow ... just wow!" The performance is at such a lofty level I don't yet have the words to describe it. The performance goes so far beyond normal high-fidelity audio playback that it is a bit disorienting to hear.
First of all, the dynamic shadings the Io Ltd FC MC is capable of is impressive, from the softest whisper, to the howitzer like impact on the big swings, the dynamics make the drama of the opera come alive. Also, it is utterly natural sounding in the most live-like way imaginable.
Then there's this enormous resolution of musical nuance and visuospatial information, and that combination of clarity and resolution is rendered in such a natural sounding way that it just gives me goose bumps.
I've never heard the bass region rendered with such resolution of nuance, with timbral textures delivered with such purity and correctness.
The soundstage and imaging performance is truly next level: imagine you are in a dark opera hall and the music starts to play, and then the lights are brought up on the stage, and you can see all the singers, orchestra, and choir, in vivid relief.
That's what it's like listening with the Io Ltd FC MC phono cartridge, it's like the whole soundstage is lit up and alive.
But there's more than that to it ... it is like my soul is lit from within by the dramatic feelings of the music, in the same fashion that the soundstage and imaging is illuminated in my living room by the superb sound quality.
I can't even fully explain what I'm hearing yet. The music sounds so wonderful, so engaging, feels so remarkable, that it is going to take me some time to sort out how the state of shock I am experiencing at hearing it can be articulated.
I'll tell you what, I'm thinking that trying to articulate what is happening in a Level 5 listening experience is going to take a whole new vocabulary of listening terminology, and "feelings" terminology, to just share the basics of what the experience is like.
Ok, time to sign off for now, as I'm starting to drool during listening.
As always, thanks for stopping by and may the tone be with you!


